Tuesday, May 26, 2026

Post-Season Checklist for Ski Lodges: Maintenance and Repair

Ski season puts your lodge through months of relentless stress. Heavy snow loads, freeze-thaw cycles, constant foot traffic, salt damage, and moisture intrusion all take their toll between November and April. But the real risk to your log structure isn’t what happens during the season — it’s what you fail to address once it’s over.

The off-season is when ski lodge owners and property managers have the time, the weather conditions, and the access to do the maintenance work that actually extends the life of a log building. Miss this window, and the damage from last winter compounds into something far more expensive by next fall.

This ski lodge maintenance checklist is built specifically for commercial log structures. It walks through every critical inspection, repair, and preservation task you should complete during the spring and summer months — before snow returns and your opportunity disappears.

Why Post-Season Maintenance Matters More for Log Structures

Standard commercial buildings need post-season attention, too, but log and heavy-timber structures operate under a different set of rules. Wood is a living material. It absorbs moisture, expands, contracts, and responds to UV exposure in ways that concrete and steel simply don’t.

During ski season, your logs are under constant assault. Snowmelt works its way into checks and cracks. Ice dams push water behind rooflines and into log walls. Interior humidity from packed guest areas creates condensation against cold exterior surfaces. Salt and de-icing chemicals degrade finishes at entry points.

All of that damage may not be visible while the lodge is operational. But once spring arrives, it reveals itself. Stain failures become obvious. Chinking gaps open up. Soft spots in the bottom logs announce moisture that’s been sitting all winter. The post-season window is when you catch these problems while they’re still manageable — and before another cycle of weather makes them worse.

A thorough post-season property checklist for a commercial log building isn’t just about cosmetics. It’s about structural preservation, guest safety, and protecting the long-term value of a significant real estate investment.

Phase 1: Exterior Log Inspection and Damage Assessment

The first step in any ski lodge off-season maintenance plan is a full exterior walk-around. You want to evaluate every log surface with fresh eyes now that the snow has cleared.

Stain and Finish Evaluation

The protective finish on your logs is your primary defense against moisture, UV damage, and biological growth. After a full winter of exposure, it’s common for stain systems to show signs of failure — especially on south- and west-facing walls that take the most sun, and on lower courses where splashback and snow accumulation are heaviest.

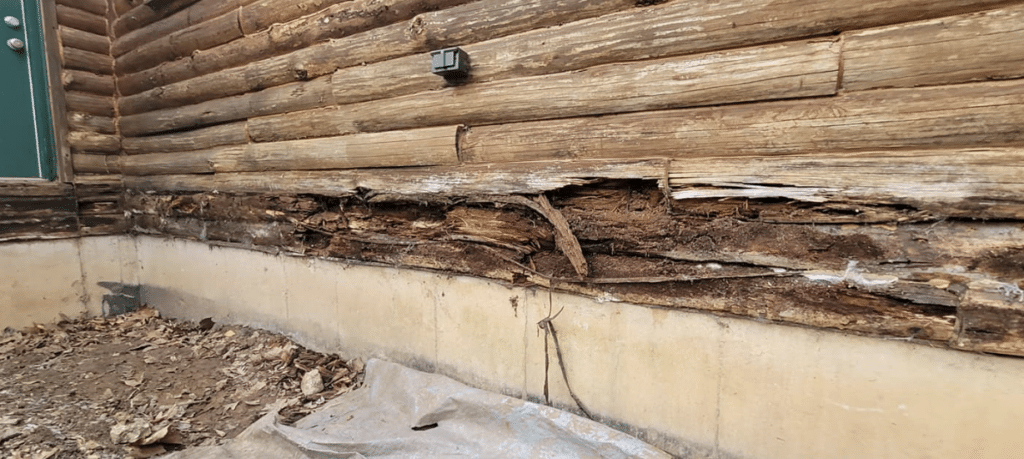
Example of what the splashback zone looks like for a log home, especially a ski resort on a hill

What to look for during your inspection:

  • Graying or discoloration on log surfaces, which signals UV degradation and finish breakdown
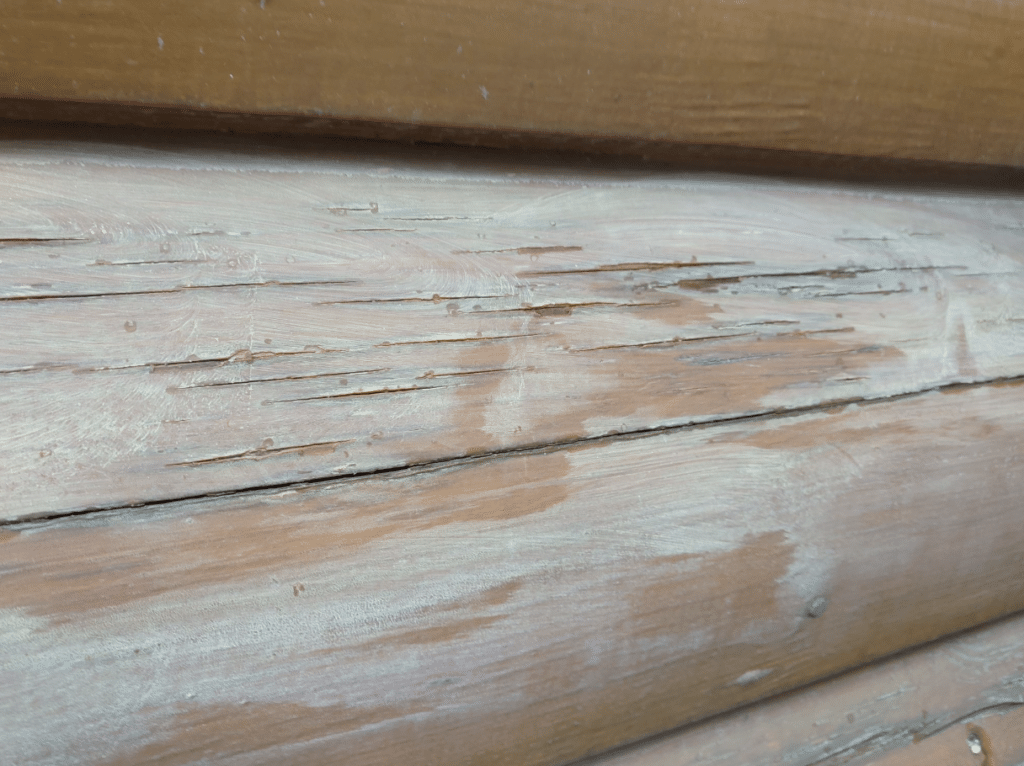
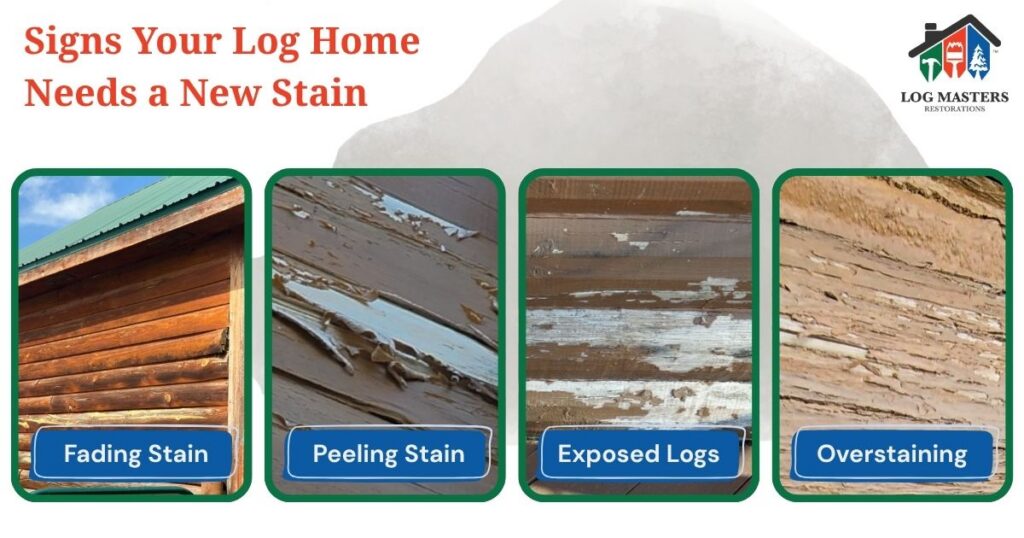
  • Peeling, flaking, or bubbling in the stain, indicating moisture is getting underneath the film
  • Water absorption tests — spray water on the log surface and watch whether it beads or soaks in. If it soaks in, the finish has failed in that area.
  • Inconsistent color between protected and exposed sections, suggesting uneven wear

If finish failures are widespread, this is a sign that a full staining project should be scheduled during the summer months when conditions are optimal for proper application and cure time.

Chinking and Caulking Inspection

Chinking and caulking are the sealant systems that prevent water and air from entering between log courses and around windows, doors, and trim. Winter’s expansion-contraction cycles are brutal on these materials.

Walk the entire structure and document:

  • Cracked or separated chinking, especially at corners and around window and door frames
  • Gaps between caulk lines and log surfaces, which indicate adhesion failure
  • Missing or deteriorated backer rod behind the sealant
  • Areas where water staining on interior walls suggests sealant failure on the exterior

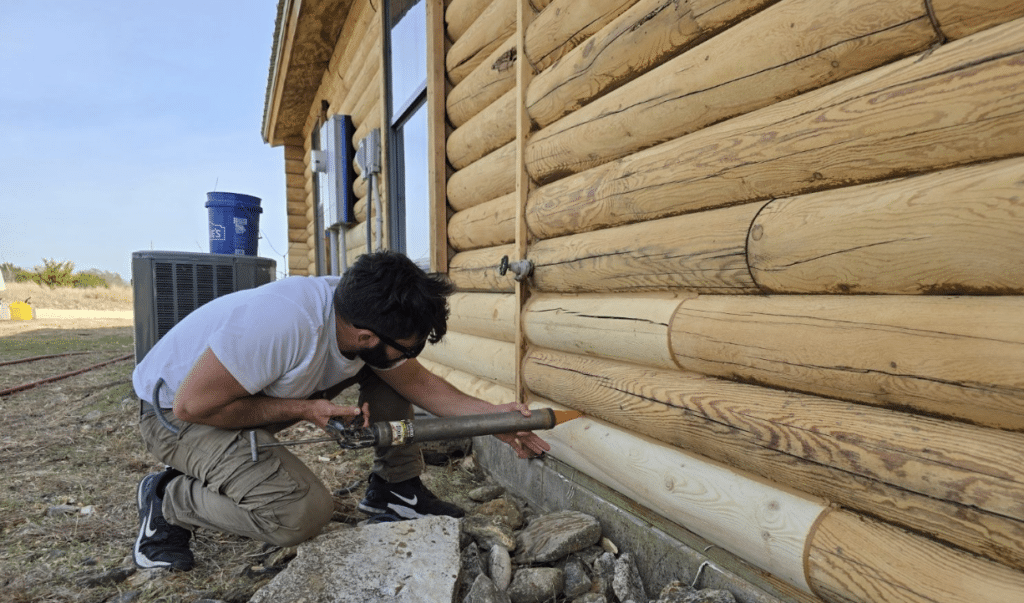
Signs of damaged caulking and chinking on log cabin ski lodge in Colorado

Small caulking repairs can often be handled in-house, but widespread chinking failure across a commercial structure warrants professional restoration. The longer failed sealants sit, the more moisture enters the log system — and that’s where rot begins.

Log Condition Assessment

This is the most critical part of your commercial log building inspection. You’re looking for signs that the wood itself has been compromised.

  • Probe test: Use an awl or screwdriver to probe log surfaces, especially bottom courses, log ends, and areas near the foundation. Soft wood indicates rot that may extend deeper than what’s visible on the surface.
  • Hollow sound test: Tap logs with a rubber mallet. A hollow sound can indicate internal decay or insect galleries.
  • Check for checks: Deep cracks (called “checks”) that face upward can collect water and become initiation points for rot. These may need to be sealed or filled.
  • Discoloration patterns: Dark streaks or staining that doesn’t match the rest of the logs can signal moisture damage or early-stage rot

If your probe test reveals soft wood or if you discover significant checking or discoloration, it’s time to bring in a log restoration specialist for a deeper assessment. Surface-level patching over rotted logs doesn’t solve the problem — it hides it until the damage becomes structural.

damaged logs with signs of log rot

Phase 2: Roof, Drainage, and Foundation Check

Your logs don’t exist in isolation. The systems above and below them directly determine how much moisture the log walls have to handle.

Roof and Gutter Assessment

After a season of heavy snow loads, inspect the roof system thoroughly:

  • Check for damaged or displaced roofing materials that could allow water to reach log walls or top-plate logs
  • Clean all gutters and downspouts. Clogged drainage systems cause water to cascade down log walls, which accelerates finish failure and moisture absorption.
  • Inspect flashing at all roof-to-wall transitions. These junctions are common leak points, and water that enters here can travel deep into the log structure before showing any visible sign.
  • Evaluate overhangs. Adequate roof overhangs are one of the best passive protections for log walls. If overhangs are insufficient, consider extending them as an off-season project.

Foundation and Grade Check

Water management at ground level is just as important as what happens at the roofline.

  • Ensure grading slopes away from the foundation on all sides. Flat or negative grades allow water to pool against the bottom logs — the single most common cause of log rot in commercial structures.
  • Inspect splash guards or gravel beds at the base of the structure. These reduce the amount of water that bounces back onto lower log courses during rain.
  • Check for soil-to-wood contact. If soil, mulch, or landscaping has built up against the bottom logs, clear it back immediately. Direct ground contact is an open invitation for moisture and insects

Phase 3: Pest Inspection and Treatment

Warm weather brings increased insect activity, and log structures are a natural target. The off-season is when you need to inspect for and treat pest issues before they become established.

What to Look For

  • Small round exit holes (about 1/16″ to 1/4″ diameter) in log surfaces, which indicate wood-boring beetles
  • Frass (fine sawdust) around holes or on horizontal surfaces below log walls
  • Mud tubes along the foundation or lower logs, which signal termite activity
  • Carpenter ant activity — these insects don’t eat wood but excavate it to create nesting galleries, often in areas where moisture has already softened the wood

Insect on damaged logs caused by infestation on log home

Treatment Approach

Preventive borate treatments applied to bare wood surfaces are one of the most common defenses against insect infestations and fungal growth in log homes. Liquid borate treatments penetrate the wood fibers, creating an environment that’s toxic to insects and helps inhibit fungal activity.

There are also targeted treatment options for active infestations, including products such as Cobra Rods, CU-BORON Rods, BOR8 Rods, and similar borate-based systems designed to treat vulnerable or already affected areas. However, traditional borate treatments only work when applied to unsealed wood, so if you’re planning a full media blasting and restaining project, pest treatment should be sequenced into that process — applied after stripping and before the new stain goes on.

Phase 4: Interior Log Surface and Systems Maintenance

Ski lodge interiors take a beating during the season. Hundreds or thousands of guests tracking in snow, salt, and moisture puts stress on interior finishes and can create conditions that damage the logs themselves.

Interior Log Surface Inspection

Walk the interior of the lodge and assess exposed log surfaces:

  • Finish wear in high-traffic areas, especially lobbies, hallways, and around fireplaces
  • Water stains or discoloration on interior log walls, which may indicate an exterior leak that needs to be traced and fixed from the outside
  • Surface mold or mildew, particularly in areas with poor airflow like corners, behind furniture, and in lower-level spaces

Interior refinishing during the off-season helps maintain a clean, professional appearance for guests while also adding a layer of protection to the wood.

Logs experiencing water damage through entry in natural checks in the logs

HVAC and Ventilation Assessment

Proper airflow directly affects log health. Lodges that are shut down or operate at minimal capacity during the summer can develop humidity problems if ventilation isn’t managed properly.

  • Run HVAC systems periodically through the off-season to prevent stagnant, humid air from sitting against log surfaces.
  • Use dehumidifiers in lower levels, basements, and any areas prone to dampness.
  • Inspect the building envelope for areas where moisture may be entering — condensation on windows, damp spots on walls, or musty odors are all red flags

A lodge that sits closed and unventilated through a humid summer can develop mold on interior log surfaces in a matter of weeks.

Plumbing and Mechanical Systems

If the lodge is fully or partially shut down during the summer:

  • Properly manage plumbing if systems will be inactive — drain systems that won’t be used, and ensure no standing water sits in pipes near exterior log walls
  • Inspect for leaks at all plumbing penetrations through log walls. Even a slow drip inside a log wall creates conditions for rot that won’t be visible until significant damage has occurred.
  • Service fire suppression systems and confirm they’re operational for the off-season. An empty lodge with a fire is a total loss.

Phase 5: Restoration and Preservation Projects

The off-season isn’t just about inspecting and repairing — it’s the best time to invest in the work that actually extends the life of your log structure by years or even decades.

Staining and Sealing

Summer provides the warm, dry conditions that stain systems need for proper application and cure. If your post-season inspection revealed widespread finish failure, this is the time to schedule a full strip-and-restain project.

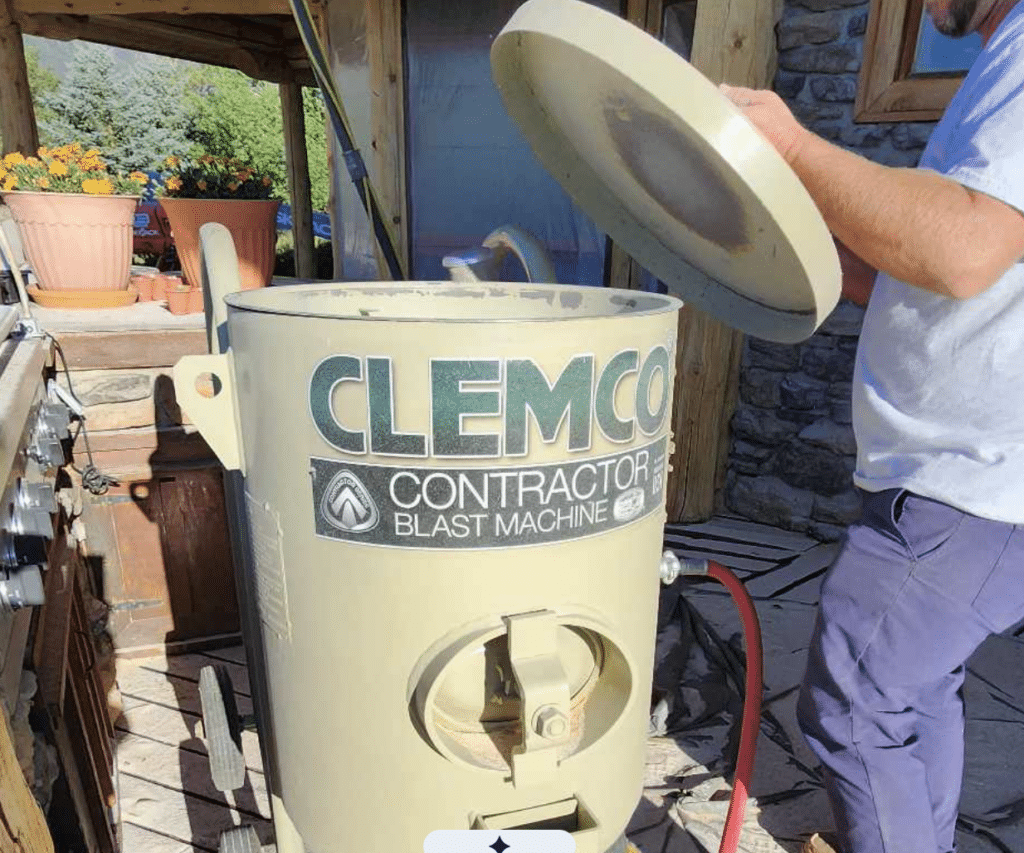
A proper restaining process for a commercial log structure involves multiple steps: surface prep (often through media blasting or chemical stripping to remove old finishes), sanding to smooth the surface, borate treatment for pest prevention, and then application of a high-quality stain system designed for log structures.

This is not a DIY project on a commercial building. The surface area alone makes it a professional-grade job, and improper prep or application can leave you with a finish that fails within a year or two rather than lasting five to seven. Choosing the right restoration specialist for your lodge is one of the most impactful decisions you’ll make as an owner.

Chinking and Caulking Restoration

If your spring inspection revealed significant sealant failure, summer is also the time to have chinking and caulking replaced. Sealant products require appropriate temperatures for proper adhesion and curing, and summer offers the longest window for work.

For commercial log structures with wide log gaps, chinking provides both a weather seal and a design element. For tighter joints, caulking is the appropriate solution. A professional crew can assess which approach is right for each area of the building and apply it in accordance with manufacturer specifications.

Log Repair and Replacement

If your commercial log-building inspection uncovered rot, structural damage, or pest-compromised logs, summer is the time to address them. Rotted sections can be cut out and replaced with new log material, then sealed and finished to match the rest of the structure.

The cost of deferred log maintenance compounds quickly. A soft spot in one log this year can become a full log replacement next year and a structural concern the year after that. Addressing these issues during the off-season — when the lodge isn’t full of guests — is both more practical and more cost-effective.

Post-Season Maintenance Summary

PriorityTaskTimingDIY or Pro
CriticalFull exterior log inspection and probe testingApril–MayPro recommended
CriticalRoof, gutter, and drainage inspectionApril–MayDIY possible; pro for repairs
HighChinking and caulking assessmentMay–JunePro for replacement
HighPest inspection and borate treatmentMay–JunePro recommended
HighInterior moisture and mold checkMay–JuneDIY for inspection; pro for remediation
MediumHVAC servicing and humidity managementMay–JulyHVAC contractor
Major ProjectFull stain strip and reapplicationJune–AugustProfessional only
Major ProjectLog repair or replacementJune–AugustProfessional only
OngoingVentilation and dehumidification during closureMay–SeptemberDIY
OngoingPlumbing leak checks at log penetrationsMonthlyDIY for inspection

Don’t Wait for the Damage to Announce Itself

The biggest mistake ski lodge owners make with log structures isn’t ignoring maintenance — it’s delaying it. Every season that passes without proper inspection and treatment gives moisture, UV, and pests another year to work. And unlike cosmetic wear, structural wood damage doesn’t plateau. It accelerates.

The months between ski seasons are not downtime for your building. They’re your one real opportunity to get ahead of the problems that winter creates.

At Log Masters Restorations, we specialize in commercial and residential log structures — from full restorations to targeted repairs and ongoing maintenance programs. If your post-season inspection has raised questions about the condition of your lodge’s logs, we can provide a professional assessment and a clear plan for what needs to happen now versus what can wait.

Your lodge works hard all winter. The off-season is when you return the favor.

The post Post-Season Checklist for Ski Lodges: Maintenance and Repair appeared first on Log Home Restoration, Maintenance & Additions | Log Masters.


source https://logmastersrestorations.com/blog/ski-lodge-maintenance-checklist/

source https://logmastersrestorations.blogspot.com/2026/05/post-season-checklist-for-ski-lodges.html

Monday, May 4, 2026

The Real Cost of Deferred Maintenance on a Log Cabin Rental Property

Owning a log cabin rental should feel like the perfect investment. It offers guests a peaceful escape, creates a steady income, and showcases the timeless beauty of natural wood construction.

But behind that charm is a reality many owners underestimate: log homes require consistent, expert care.

When rental cabin maintenance is delayed or overlooked, the consequences are rarely immediate. Instead, they build quietly over time, turning small, manageable issues into costly, complex repairs.

What begins as a simple upkeep task can quickly evolve into a major restoration project that impacts your property’s value, guest experience, and long-term profitability.

Understanding these risks is the first step toward protecting your investment and ensuring your cabin continues to deliver both beauty and performance for years to come.

Why Log Cabins Require a Higher Standard of Maintenance

Unlike traditional homes, log cabins are built from natural materials that respond constantly to their environment. Wood expands, contracts, absorbs moisture, and reacts to sunlight, insects, and temperature changes. This is part of what gives a log home its character, but it’s also what makes rental cabin maintenance essential.

The challenge is that deterioration doesn’t always show itself right away. Moisture can seep behind the stain, insects can burrow beneath the surface, and failing chinking can allow air and water to enter long before visible damage appears.

What may look like natural aging—a bit of fading or a soft spot—can actually signal deeper structural concerns. And because these issues develop quietly, the gap between “routine maintenance” and “major repair” is often much smaller than most owners expect.

The Hidden Costs of Skipping Routine Care

When maintenance is deferred, the cost is never limited to a single repair. Instead, it compounds across multiple areas of your property and your business.

Small Issues Turn Into Major Repairs

Log homes don’t give you much room for error. A small crack in chinking or a worn stain layer can allow moisture to enter the logs. Over time, that moisture leads to rot, insect activity, and structural weakening.

What could have been resolved with a routine maintenance visit may eventually require log replacement, structural repair, or full exterior restoration.

This is one of the most important truths about rental cabin maintenance: prevention is always more affordable than repair.

The Paint Problem Most Owners Don’t See Coming

One of the most common mistakes rental cabin owners make is assuming paint will solve their problems.

At a glance, paint can make a cabin look refreshed. But in log homes, it often does the opposite of what you want.

Paint doesn’t allow the wood to breathe the way proper log home stains do. Instead of addressing underlying issues, it can trap moisture inside the logs and hide early signs of rot or damage.

In many cases, paint is applied because something is already wrong.

And here’s where it becomes costly.

Removing paint from a log cabin isn’t a simple touch-up. It often requires the same level of effort as a full restoration, including media blasting or chemical stripping. If hidden rot is discovered during that process, repair costs can increase even further.

What started as a “quick fix” can end up accelerating damage and significantly raising the cost of proper restoration.

This is why working with a log home specialist—not a general contractor or painter—is critical when maintaining your investment.

Decreased Property Value

A well-maintained log cabin is a valuable asset. A neglected one raises red flags for buyers and inspectors.

Soft logs, faded finishes, and failing seals signal that major work is needed. This often results in:

  • Lower offers
  • Longer time on the market
  • Failed inspections

Consistent maintenance protects not just your home, but your ability to sell it when the time comes.

Lost Revenue From Guest Experience

When maintenance is delayed long enough, repairs aren’t just inconvenient—they interrupt your business.

Routine rental cabin maintenance can often be completed in just a few days, sometimes even over the course of a long weekend. But once damage progresses into full restoration, timelines change significantly.

Depending on the size of your cabin and the scope of work, restoration projects can take days or even weeks to complete.

That means:

  • Paused bookings
  • Lost rental income
  • Disrupted peak-season availability

What could have been handled quickly during a scheduled maintenance window can turn into extended downtime that directly impacts your bottom line.

The Most Commonly Overlooked Maintenance Areas

When it comes to protecting your cabin, some areas are more vulnerable—and more frequently neglected—than others.

Exterior Logs: Your First Line of Defense

The exterior of your log home takes the full impact of the elements. Sunlight breaks down stain, moisture penetrates exposed wood, and temperature changes cause movement that stresses seals and joints.

Routine staining, sealing, and chinking repairs are essential parts of effective rental cabin maintenance. When these are skipped, logs become vulnerable to rot and structural damage.

Roof and Drainage Systems

Your roof and gutters protect everything below them. When they fail, water intrusion becomes inevitable.

Clogged gutters, poor drainage, or unnoticed roof damage can lead to moisture buildup in logs, foundations, and interior spaces. Regular inspections are one of the simplest ways to prevent costly repairs.

Decks, Porches, and Outdoor Spaces

Outdoor structures are often exposed to the harshest conditions, and they’re also where safety risks can develop.

Soft boards, loose railings, and rotting posts are more than cosmetic issues. These issues in rental properties create liability concerns and potential hazards for guests.

Interior Wood and Surfaces

The inside of your cabin matters just as much as the outside. Floors, walls, and trim require ongoing care to prevent moisture damage, staining, and wear.

A clean, well-maintained interior enhances the guest experience and reinforces your property’s quality.

The Liability Risks You Can’t Afford to Ignore

Deferred maintenance doesn’t just cost money—it can put your entire investment at risk.

Insurance companies routinely inspect rental properties, and visible issues like rotting decks, unsafe railings, or structural deterioration can lead to coverage being reduced or dropped altogether.

If that happens, you may be required to complete repairs before coverage is reinstated.

That creates a dangerous window where:

  • Your property may be uninsured
  • You may need to pause rentals
  • You are fully exposed to unexpected loss

This isn’t a theoretical risk. We’ve spoken with cabin owners who lost insurance coverage due to deferred maintenance, only to face catastrophic events like wildfires without protection in place.

The result can be devastating—losing the home entirely while still being responsible for the mortgage.

Consistent rental cabin maintenance isn’t just about preserving your property. It’s about protecting your financial future.

When DIY Maintenance Works—and When It Doesn’t

There’s no question that some maintenance tasks can be handled by the owner. Cleaning gutters, replacing filters, and performing visual inspections are all valuable steps.

But log homes require specialized knowledge that goes beyond general home care.

Identifying early-stage log rot, evaluating stain performance, or properly repairing chinking requires experience with how log structures behave over time.

Using the wrong products or missing underlying issues can lead to more extensive damage. That’s why it’s important to know when to bring in a professional.

A trained log home inspector knows what to look for beneath the surface—issues that aren’t visible to the untrained eye but can lead to significant damage over time. Catching these early is what separates simple maintenance from costly restoration.

Why Working With Log Home Specialists Matters

Not all contractors understand log homes, and that difference matters more than most owners realize.

Log Masters Restorations has spent over twenty years working exclusively with log homes. That experience allows us to identify issues early, recommend the right solutions, and apply proven techniques that protect your home long-term.

We are here to not only fix problems, but also help prevent them.

Our services include:

  • Log repair and replacement
  • Chinking and caulking
  • Staining and sealing
  • Media blasting and surface preparation
  • Ongoing maintenance plans

Every service is designed to preserve the integrity, beauty, and value of your home.

And just as important, we take the time to educate homeowners so you understand what your cabin needs and why.

Protect Your Investment Before Problems Grow

If there’s one takeaway, it’s this: waiting is the most expensive decision you can make.

Log homes don’t stop deteriorating. The longer maintenance is delayed, the more complex and costly the solution becomes.

Consistent rental cabin maintenance gives you:

  • Peace of mind
  • Better guest experiences
  • Stronger property value
  • Lower long-term costs

At Log Masters, we believe your property should be something you’re proud of, not something you’re worried about.

If you’ve been putting off maintenance or aren’t sure what your cabin needs, now is the time to act.

Call a Log Master Today

Your cabin deserves expert care, and you deserve confidence in your investment.

Reach out to Log Masters Restorations today for a free estimate. We’ll help you understand exactly what your home needs and create a plan to protect it for years to come.

The post The Real Cost of Deferred Maintenance on a Log Cabin Rental Property appeared first on Log Home Restoration, Maintenance & Additions | Log Masters.


source https://logmastersrestorations.com/blog/deferred-maintenance-on-rental-cabin/

source https://logmastersrestorations.blogspot.com/2026/05/the-real-cost-of-deferred-maintenance.html

Wednesday, March 18, 2026

How to Choose the Right Log Cabin Restoration Specialist for Your Home

Your log cabin deserves more than a contractor who “also does” log homes. Finding the right restoration specialist is less like hiring someone to repaint a bedroom and more like choosing a mechanic for a classic truck. Anyone can make it look good for a little while. Not everyone understands how it actually works.

The wrong choice might not seem wrong immediately. The stain may look fresh. The repairs may look clean. But if the prep work was rushed, the wrong products were used, or moisture issues weren’t addressed, those shortcuts usually show up later — and by then, they’re expensive.

The log home market continues to grow, which means more contractors are adding “log homes” to their service list. That does not automatically make them specialists. Let’s walk through what really separates experienced log cabin restoration specialists from contractors who could leave you with bigger problems than you started with.

1. Look for Someone Who Specializes in Log Homes, Not a General Contractor

Why Log Homes Require Specialized Knowledge

Log homes are their own category. The wood expands and contracts with the seasons. Moisture can sneak into checks and sit there quietly. Over time, that moisture breaks down fibers and leads to log rot.

A general contractor may be great with drywall, trim, and roofing. But log work requires an understanding of borate treatments, log-compatible stains, surface preparation methods, and how to seal a log home without trapping moisture inside the wood.

We’ve seen cabins where someone treated the logs like regular siding. A few years later, the stain was peeling, water had crept in around log ends, and the homeowner was facing structural repairs instead of simple maintenance. That’s usually when people realize log homes are not just “wood houses.”

Ask: “How many log homes have you restored?”

This question cuts through the sales talk quickly.

You are not listening for confidence. You are listening for experience. A true specialist will talk about specific problems they’ve encountered, what caused them, and how they corrected the root issue. They will understand the difference between cosmetic repairs and structural repairs. They will be able to explain staining systems, chinking details, and moisture control without reading from a brochure.

It is also smart to ask about manufacturer certifications. If a company is certified or endorsed by manufacturers like Perma-Chink Systems or Sashco, that usually signals they have invested in training and product knowledge beyond standard construction practices.

Do: Review their log home portfolio

Before-and-after photos are helpful, but do not just admire the color change.

Zoom in. Look at the chinking lines. Are they clean and consistent? Look at the repaired logs. Do they blend naturally, or do they stand out like a patch? Look at the stain coverage. Does it look even and well-prepared?

If your cabin has rot damage, ask to see projects where they performed actual log repair or replacement, not just washing and staining. A fresh coat of stain can make anything look good for a short time. Solid repairs last.

2. Find Restoration Specialists Who Use Log-Specific Products

Stain is not paint

If you remember nothing else from this post, remember this: stain is not paint.


Paint keeps moisture in the logs and can lead to rot. Stain allows the logs to breathe naturally without compromising the finished product. Although stains are meant to act like a conditioner, protecting the wood fibers from environmental damage, they do wear off over time, just like conditioner or lotion.

We have restored more than a few cabins that were painted because they looked good at the time. Fixing that decision usually involves stripping everything back to bare wood and rebuilding the correct finish system. That is rarely a small project.

Log home sealants are different than traditional caulking

Standard caulking works fine for materials that do not move much. Logs move constantly.

Log home chinking and caulking products are designed to stretch and compress with seasonal changes. When someone uses the wrong product, you often see shrinking, cracking, gaps, drafts, and moisture intrusion within a short period of time.

Ask directly, “What brands and systems do you use?”

Professional log cabin restoration specialists should answer clearly and explain why they use what they use. If the response sounds vague or depends on what is available at the local store that week, that is a warning sign.

3. Evaluate Their Inspection and Restoration Process

Do they educate you instead of pressure you?

You should never feel pressured to sign a contract.

The right specialist will walk you through what they see, explain what it means, and tell you what happens if you address the issue now versus later. They should welcome questions and treat you like a partner in the process.

Most homeowners who call about log cabin restoration are already stressed. You might be worried about safety, cost, or whether the damage is worse than it looks. A professional should reduce that stress, not increase it.

If someone jumps straight to numbers without explaining the problem clearly, that is worth pausing over.

Do they provide a detailed written assessment and restoration plan?

A professional restoration plan should clearly outline what was found, why it is happening, and what is recommended. It should explain the prep methods, product systems, timeline, and scope of work. Pricing should be clear, not filled with vague allowances that can shift later.

When the plan is detailed, you understand what you are paying for. When it is vague, surprises are more likely.

Ask: “How do you determine the root cause, not just the surface problem?”

Surface symptoms are rarely the full story.

If the stain is failing, why?

If logs are soft, where is the moisture coming from?

If chinking is separating, is it product failure, prep failure, or natural movement from settling?

Quality log cabin restoration specialists trace the problem back to the source. Otherwise, you may end up paying to fix the same area again in a few years.

4. Work With Someone Licensed, Insured, and Standing Behind Their Work

Before you sign anything, verify that the company has active contractor licensing as required in your state, general liability insurance, and workers’ compensation coverage. If they cannot provide proof quickly, do not move forward.

This is not about being overly cautious. It is about protecting yourself and your property.

Ask: “Do you offer a workmanship warranty, and what does it cover?”

Warranties should be written, specific, and easy to understand. At a minimum, you should expect a workmanship warranty, along with any manufacturer warranties that apply to the stain or coating system being used.

If the answer is unclear or avoids specifics, that tells you something.

Understanding Typical Log Cabin Restoration Costs

Full restoration can range from $15,000 to $100,000 or more, depending on size, condition, access, and scope of work.

Common cost drivers include stripping and staining, chinking or caulking repairs, log repair and replacement, prep work such as blasting or chemical stripping, and moisture remediation.

Annual maintenance is usually a smaller investment, but it plays a major role in preventing large-scale restoration later. A simple yearly wash and inspection can catch early problems before they become log-replacement projects.

It is almost always cheaper to maintain wood than to rebuild it.

Red Flags to Watch for Before You Hire

Extremely low bids should raise questions. If one quote is dramatically cheaper than the others, ask what is being skipped. Often, it is prep work, repairs before stain, proper materials, or insurance overhead. Low bids can become expensive lessons.

Vague or incomplete proposals are another concern. If the proposal does not clearly list prep methods, product brands, and the scope of repairs, you are exposed to surprises once work begins.

Contractors who “also do” log homes should be approached carefully. Log home restoration is specialized. You want a team that handles this type of work consistently, not occasionally.

Finally, be cautious of anyone who wants to skip prep work. Prep is not optional. It is the foundation of the entire system. If someone suggests washing it quickly and applying stain without proper preparation, you are likely looking at premature failure.

Choose a Long-Term Partner, Not a One-Time Contractor

A well-cared-for log home can last for generations. That usually requires a long-term mindset, not a one-and-done project.

Look for a company that documents your home’s condition over time, helps you stay ahead of maintenance cycles, gives you a clear plan rather than just a quote, and remains available after the job is complete.

The best log cabin restoration specialists typically follow a clear approach: assess, plan, implement, then maintain.

Your cabin is more than wood and stain. It is your retreat, your investment, and the place your family gathers. Choose the specialist who treats it that way.

The post How to Choose the Right Log Cabin Restoration Specialist for Your Home appeared first on Log Home Restoration, Maintenance & Additions | Log Masters.


source https://logmastersrestorations.com/log-homeowner-education/choosing-right-log-home-restoration-specialist/

source https://logmastersrestorations.blogspot.com/2026/03/how-to-choose-right-log-cabin.html

Tuesday, March 17, 2026

Living in Your Log Home During Restoration: A Complete Guide

You’ve started noticing the signs. The stain is fading. The chinking has small gaps. Maybe you pressed on a log end, and it felt softer than it should.

Now you’re facing a very practical question:

Can you actually live in your log home during restoration?

The honest answer? Sometimes yes. Sometimes absolutely not.

Living in your log home during restoration is kind of like remodeling a kitchen while still cooking dinner every night. It can work — but only if you understand what’s coming and prepare for it. Some homeowners manage just fine. Others realize, about three days in, that they underestimated the dust, the noise, or the inconvenience.

The difference usually comes down to scope, safety, and expectations.

Whether you’re planning a minor exterior refresh or a full-scale log repair project, it’s smart to know what you’re signing up for before the scaffolding goes up.

Is Living in Your Log Home During Restoration Realistic?

Not all restoration projects are created equal. Some are manageable with a little preparation. Others simply aren’t safe or practical for occupancy.

Factors That Determine Whether You Can Stay

1. Scope of the Project
Exterior staining and light chinking touch-ups are very different from structural log replacement or full media blasting. If the work is mostly on the surface and the structure is sound, staying may be realistic. If major sections of logs are being removed or replaced, that’s a different conversation.
We’ve had projects where homeowners barely felt the impact beyond daytime noise. We’ve also had projects where living inside would have been like camping in a construction zone.

2. Timeline
A two- to three-week exterior project is much easier to manage than a multi-month structural overhaul. Short-term inconvenience feels very different from living in a long-term renovation.

3. Your Home’s Condition
If your log home is structurally sound and utilities remain operational, living in your log home during restoration may be possible. If there are foundation issues, extensive rot, or compromised systems, relocation may be the safer option.
If safety is questionable, that’s not the time to tough it out.

4. Your Daily Life
Working from home? Have young kids? High-energy dogs? Those details matter.

Noise, limited access to certain areas, and crew movement around your property can complicate normal routines quickly. What feels manageable on paper can feel very different once compressors and sanders fire up at 8:00 a.m.

Types of Restoration Work and Occupancy Compatibility

Exterior Staining and Chinking

This is the most common scenario of living in a log home during restoration works.

You can expect equipment on site, noise during working hours, and limited access to certain exterior walls or entry points. Your interior living space typically remains functional. Most homeowners stay during these projects without major issues, as long as they’re prepared for daytime disruption.

Media Blasting and Heavy Prep Work

Media blasting is where things get more intense.

Blasting creates significant dust. Even with containment measures, fine particles can migrate. We take dust control seriously, but blasting is neither quiet nor tidy.

In many cases, we recommend temporary relocation during blasting phases — not because it’s impossible to stay, but because indoor air quality and comfort matter. A few days away can make a big difference.

Log Repair and Replacement

When structural logs are being replaced, sections of your home may be temporarily opened up. Depending on the severity, you may need to relocate during those phases.

If sill logs or load-bearing sections are involved, safety becomes the deciding factor. That’s not something to gamble on.

Full Interior and Exterior Renovations

When multiple systems are being impacted at once, living in your log home during restoration usually becomes impractical.

At that point, it’s not just about noise. It’s about access, utilities, and safety.

Critical Safety Considerations Before You Decide

Safety always comes first.

Structural Integrity

Before committing to stay, your contractor should evaluate sill logs, load-bearing logs, roof stability, and foundation condition.

If the structure is compromised, staying inside simply isn’t worth the risk. No project timeline is more important than your safety.

Air Quality and Hazardous Materials

Older log homes can harbor hidden health risks. Lead-based coatings, asbestos, or mold can become hazardous when disturbed.

If those materials are present, relocation during that phase is mandatory. That’s not overreacting — it’s responsible.

Even with modern staining systems, ventilation and cure time matter. We plan around those phases carefully to protect homeowners and indoor air quality.

Habitability and Utility Access

You need access to water, sanitation, heating or cooling, and safe electrical systems.

Ask upfront:

  • Will water be shut off?
  • Will electrical systems be interrupted?
  • Will HVAC be impacted?

Short interruptions are manageable. Extended outages are not. Losing utilities for a few hours feels different than losing them for days.

Preparing for Living in a Log Home During Restoration

If you decide to stay, preparation makes all the difference.

Create Clear Living and Work Zones

Divide your home into defined areas before work begins. Your primary living spaces — bedrooms, bathrooms, kitchen — should be clearly separated from active work zones.

The goal is to minimize the number of times you cross into construction areas. The less you feel like you’re walking through a job site, the better.

Protect What You Use Every Day

Dust travels farther than most homeowners expect.

Move valuables, electronics, and important documents away from work areas. Cover furniture. Seal closets if possible. Think ahead about daily essentials. Relocate clothing, toiletries, and kitchen basics so you’re not constantly navigating around equipment to grab a towel.

It’s much easier to prepare upfront than to reorganize mid-project.

Plan for Temporary Adjustments

You may need alternate entry points if certain doors are blocked. You may need backup meal plans if access is limited for a few days.

This doesn’t mean your home turns into chaos. It just means flexibility becomes part of the plan.

Prioritize Air Quality

If you are living in your log home during restoration, indoor air quality should not be an afterthought.

HEPA air purifiers can help during active phases. Keep windows closed during sanding or blasting. Follow your contractor’s guidance on ventilation during staining or chemical applications.

A professional restoration team should take containment and cleanup seriously. Clear communication about dust control helps keep your home livable.

Managing Daily Life During Restoration

Expect Noise and Disruption

Sanders, grinders, and compressors are part of the process. Restoration is not silent work.
If you work from home, communicate your meeting schedule. We often coordinate louder tasks around critical times when possible. Clear communication goes a long way.

Children and Pets

Construction zones are not playgrounds.

Establish clear no-entry areas. Supervise children closely. Consider temporary daycare or pet boarding during heavier work phases.

Even the calmest dog can get curious around new equipment.

Protect Your Peace of Mind

Restoration can be stressful. It is temporary, but it requires patience.

Set realistic expectations. Take breaks away from the house when needed. A coffee shop afternoon or a weekend away during an intense phase can make the entire experience feel more manageable.

Coordinating With Your Restoration Team

A smooth project depends on communication.

Before work begins, review the full scope, clarify timelines, establish access boundaries, and confirm working hours.

When living in a log home during restoration, daily coordination matters. Know which areas crews will access and when. Plan your routines accordingly.

At Log Masters Restorations, we prioritize detailed planning before we ever start. Surprises make restoration harder than it needs to be. Clear expectations make it manageable.

When Moving Out Makes More Sense

Sometimes the smartest decision is to temporarily relocate.

That’s not failure. It’s a strategy.

Consider moving out if structural repairs compromise safety, hazardous materials are involved, utilities will be down for extended periods, or the project timeline is long and invasive.

In some cases, relocating actually allows work to move more quickly and efficiently. Fewer interruptions can shorten the total project duration.

Making the Right Decision for Your Log Home

There is no one-size-fits-all answer.

Living in your log home during restoration is possible in many cases, especially with exterior-focused projects. But it requires preparation, flexibility, and a professional team that understands how to protect both your home and your health.

Your log home is more than wood and stain. It’s your retreat. It’s where your family gathers. Whether you stay or temporarily relocate, the priority is doing the restoration correctly the first time.

If you’re in the South Central, Mountain West, Midwest, or Mid-South area and planning a project, contact Log Masters Restorations for a free estimate. With over 20 years of experience in log repair, staining, chinking, sandblasting, and rot removal, we’ll help you determine the safest and most practical path forward so your log home can be enjoyed for generations to come.

The post Living in Your Log Home During Restoration: A Complete Guide appeared first on Log Home Restoration, Maintenance & Additions | Log Masters.


source https://logmastersrestorations.com/blog/living-in-your-log-home-during-restoration-a-complete-guide/

source https://logmastersrestorations.blogspot.com/2026/03/living-in-your-log-home-during.html

Thursday, March 5, 2026

Log Home Financing Options You Need to Know

Financing a log home is not quite like getting a standard suburban mortgage. The property is unique, the build process is different, and lenders view risk through a narrower lens. The good news: with the right log home financing options and a clear plan, you can move from dream to dried-in shell to a finished retreat.

At Frontier Log Homes, our team has guided owners across the U.S. for decades, from design to delivery, with handcrafted log cabins, turn-key builds, and log cabin kits that suit a wide range of budgets.

Understanding Log Home Financing: What Makes It Different

Log homes sit in a bit of a gray area when it comes to financing, and that’s where things can get tricky.

Many traditional lenders aren’t sure how to evaluate log homes because they’re considered nontraditional, and the resale market is smaller than for standard homes. That means underwriters spend extra time looking for comparable sales, factoring in long-term maintenance, and considering how easy the home would be to resell, especially in rural areas.

It’s not unusual for buyers with great credit and solid finances to hear, “You qualify for a regular house, but not a full log cabin.” The key is knowing which lenders understand materials, timelines, and how log homes appreciate over time.

Common Financing Obstacles

The reality check comes during underwriting. Lenders identify log homes as nontraditional, even when buyers qualify on paper, leading to denials despite solid financials.

Down payment requirements often exceed 25% cash and land equity compared to conventional loans, due to market caution and perceived risks of a value drop.

This is usually considered the biggest issue in log home financing.

Appraisal timing adds another layer. Appraisals must be no older than 120 days [1] when loans are sold to investors, yet log home construction averages 12 months. This often forces new appraisals after 14 months total, risking value shortfalls where a $250,000 build might appraise lower.

Conservative appraisers compound the problem, especially without nearby comparable log home sales. Rural acreage further complicates things, as secondary lenders restrict properties on larger tracts due to resale and marketability concerns.

Red Flags Lenders Watch For:

  • Incomplete cost estimates or vague budget line items
  • No strategy for providing comparable sales in low-turnover markets
  • Unrealistic timelines that ignore rural permitting delays
  • Builder with limited log-specific experience or poor references
  • Site access issues for crane delivery or utility connections

The Advantage of Specialized Log Home Lenders

Specialized mortgage lenders for log homes understand the product, the sites, and the build rhythm. They know log-specific settling allowances, fire and snow-load engineering, and rural infrastructure hurdles. Their construction drawing processes are built for active job sites, which can mean quicker approvals than at traditional institutions. That speed matters when crews, cranes, and materials are queued and weather windows are tight.

Construction Loans for Building Your Log Home

Most new log homes are financed using a construction loan. In 2026, interest rates for new builds typically fall in the 9% to 14% [2] range, which is higher than a traditional fixed mortgage since the home isn’t finished or usable as collateral yet.

Construction lending is still very active, with loan volume reaching about $91.2 billion in Q3 of 2025. These loans are short-term, usually lasting 6 to 18 months, with loan amounts commonly ranging from $75K to $2.5M or more. Instead of getting all the money upfront, funds are released in stages as different parts of the build are completed.

Once approved, your lender signs off on your budget, timeline, and draw schedule, then releases money as work is completed and inspected. You’ll likely need to provide things like progress photos, lien waivers, and updated cost reports along the way.

Frontier can help you align early so your log cabin package matches real-world build steps, materials, and on-site logistics, making the financing process much smoother.

Construction-to-Permanent Loans (One-Time Close)

A construction-to-permanent loan combines your build financing and long-term mortgage into one streamlined loan. You close once, fund construction through scheduled draws for land, materials, and labor, and typically make interest-only payments while the home is being built.

After construction is complete, the loan automatically converts into a 15- or 30-year mortgage, helping you avoid a second closing and reduce upfront costs. Fewer moving parts, fewer surprises.

Most use interest-only payments during the build, which helps cash flow while you cover site work, utilities, and materials.

Stand-Alone Construction Loans (Two-Time Close)

Stand-alone construction loans keep your build financing separate from your permanent mortgage. You close twice, which means two rounds of fees and paperwork, but you gain flexibility to shop the market for the best long-term cabin mortgage once the house is finished.

If rates improve during your build or you want to switch lenders, this path can still pay off, even with extra closing costs.

Real Financing Scenarios

Understanding how buyers work through these challenges helps set realistic expectations from the start. Most successful log home buyers tend to have credit scores of 620 or higher, though lower scores can still work with the right lender and a little extra effort. Down payments usually fall in the 10–20% range, and some specialty lenders offer more flexible options for well-qualified borrowers.

The most common hurdles include appraisals that are tough to support due to limited comparable sales, higher upfront costs before a log package is delivered, elevated interest rates tied to perceived risk, and rigid draw schedules from banks that don’t have much experience with log homes. The best way around these issues is often working with lenders who specialize in nontraditional builds or local banks that understand rural markets and seasonal construction.

A clear trend shows up here: buyers who run into appraisal problems tend to succeed when they provide nearby log home comparables within about 50 miles, plan for weather-related delays in three-season builds, and work with lenders familiar with unique properties. For those facing higher down payment requirements, some use a HELOC to get through the dry-in stage, then refinance into a conventional mortgage once the home is complete and eligible for standard financing.

Which Financing Path Fits You?

Choosing the right structure depends on your situation, timeline, and risk tolerance. This comparison helps clarify your options:

Construction-to-Permanent Loan

Best For: First-time builders who want a simpler process
Down Payment: Typically 10–20%
Timeline: About 12–18 months
Key Advantage: One closing with the option to lock in your rate upfront
Watch Out For: Less flexibility if interest rates drop during construction

Stand-Alone Construction Loan

Best For: Experienced buyers who want to shop for the best long-term rate later
Down Payment: Commonly 20–25%
Timeline: Roughly 6–12 months to build
Key Advantage: Freedom to secure a permanent mortgage after construction
Watch Out For: Two closings and higher total fees

Conventional Loan (Existing Home)

Best For: Completed log homes with strong comparable sales
Down Payment: Around 15–20%
Timeline: Typically 30–45 days
Key Advantage: Standard loan terms and competitive interest rates
Watch Out For: The home must be finished and fully code-compliant

Specialty Log Home Lender

Best For: Rural locations or unique log home designs
Down Payment: Varies, usually 10–25%
Timeline: More flexible than traditional loans
Key Advantage: Lenders understand log-specific construction and risks
Watch Out For: Interest rates may be higher

HELOC or Home Equity Loan

Best For: Phased builds when you already have usable home equity
Down Payment: Not required since equity is used
Timeline: Flexible, with ongoing draws
Key Advantage: Lower rates and flexible access to funds
Watch Out For: Puts your existing home at risk

Permanent Mortgage Options for Log Homes

After the last inspection and certificate of occupancy, your focus shifts to the long-term mortgage for cabin ownership. Options mirror the broader market, yet underwriting still weighs the property’s uniqueness, location, and comps.

Conventional Mortgages for Existing Log Homes

Conventional mortgages work for completed, code-compliant log homes with solid comps. Some portfolio lenders even market cabin mortgage products built for rural properties.

One national example shows log home loans with 15% down and no PMI at roughly ~6.71% APR as of early 2026 [3]. Terms vary by lender, and some will still treat a log cabin mortgage like construction if the home is not fully finished, so ask early.

FHA and VA Loan Eligibility

FHA and VA can be options for financing a cabin if the property meets program standards and the borrower qualifies. That typically includes permanent foundations, code compliance, and a livable condition at closing.

These programs can help first-time buyers or qualified veterans access a mortgage for cabin ownership with friendlier down payments and competitive cabin loan rates.

Jumbo Loans for High-Value Log Properties

High-end, custom log estates often exceed conforming loan limits. Jumbo loans fit that tier but expect strong credit, reserves, and a compelling appraisal package. Work with mortgage lenders for log homes who know how to document craftsmanship, energy performance, and market demand so a jumbo underwriter can see the full story.

Land and Lot Financing

Your financing plan should account for the dirt as much as the house. Raw land usually requires larger down payments, while improved lots benefit from existing roads and utilities. Some lenders let you combine land and build in a single-close package, which can save time and reduce fees.

Undeveloped parcels typically demand bigger equity. Approvals require a site plan, access details, and development timeline, with stricter credit and income screens compared to home mortgages. Lots with utility stubs and road access are easier to finance. Lenders often favor borrowers with a credit score of ≥670.

If you already own land, many construction lenders will count that equity toward your down payment when financing a log home. Single-close construction-to-permanent loans can bundle the lot, site work, and house into one package, often allowing land equity to serve as your 20-25% down payment.

Specialized Log Home Mortgage Lenders

Finding the right partner can make or break your timeline. National platforms with log home experience, regional banks that have done these kinds of loans, and rural-focused institutions all play a role.

Shop around, compare terms, and ask each lender to walk you through their cabin loans step by step. Seek lenders who understand log-home-specific features rather than treating your project as an obstacle to avoid.

Compare at least three offers and look beyond the rate. Ask how they handle draws, inspections, and change orders.

Alternative and Creative Financing Solutions

Sometimes the straight path is not the best fit. Depending on your equity, timing, and risk tolerance, a creative approach can help you secure a mortgage on a log cabin without derailing cash flow.

If you own a home now, tapping equity can fund land, site prep, or your dry-in stage at potentially lower costs than a construction loan. A HELOC can bridge phases while you finalize a cabin mortgage, then be paid off once your permanent financing closes. Some builders maintain relationships with lenders comfortable with log cabin financing, which can speed approvals and simplify appraisals.

If a seller offers terms, owner financing can sidestep bank timelines and strict underwriting. You still want clear documentation, proof of insurance, and a roadmap to refinance into a conventional cabin mortgage once the property is complete.

Building in phases can reduce borrowing needs. Many owners start with a Frontier Log Homes kit or a dry-in package, then finish interiors as budget allows. This approach aligns with a budget-first plan and can help you keep cabin loan rates exposure lower.

Taking the Next Steps Toward Your Log Home

Strong financing starts with a buildable plan and preparation. Before approaching lenders, gather these essentials:

Qualification Checklist:

  • Credit score (target 680+ for best terms, 620 minimum for many programs)
  • 6 months reserves beyond down payment and closing costs
  • Detailed budget with line-item breakdown for materials, labor, and site work
  • 3+ log home comps within 50 miles (work with appraiser early)
  • Builder track record, references, and log-specific experience
  • Site plan with utility access, road conditions, and permits confirmed
  • Timeline that accounts for weather, permitting, and inspection delays

Check zoning and setbacks, confirm access for heavy equipment, and map utilities or wells. Choose a homesite with stable soil and good drainage, and prepare structural calculations early to keep your lender and appraiser confident. Then match the right log home financing options to your timeline and comfort level.

Ready to plan your cabin financing and design together? Talk with Frontier Log Homes. We craft handcrafted log cabins, turn-key builds, timber frames, hybrid log homes, and log cabin kits, plus dry-in packages and on-site assembly support. Whether you need general contracting, a skilled crane crew, or consulting to guide your builder, our team helps you move from first sketch to front door with clarity and confidence.

Resources

[1] https://logcabins.com/obtaining-financing-for-your-log-cabin-home/
[2] https://blog.lending.groundfloor.com/best-new-construction-loan-rates-2026-what-really-wins
[3] https://www.rural1st.com/loan-types/log-homes

The post Log Home Financing Options You Need to Know appeared first on Log Home Restoration, Maintenance & Additions | Log Masters.


source https://logmastersrestorations.com/blog/log-home-financing-options-you-need-to-know/

source https://logmastersrestorations.blogspot.com/2026/03/log-home-financing-options-you-need-to.html

Thursday, August 21, 2025

Cabin Winter Maintenance Checklist: Keep Your Log Home Winter-Ready

Winter may bring beauty, but it also brings challenges for log cabins. Freezing temperatures, snow, ice, and moisture can take a toll on your home if you don’t prepare. Without proper care, problems such as rot, drafts, and pest infestations can occur and cause costly damage.

That’s why we’ve created this cabin winter maintenance checklist. It combines simple tasks you can do yourself with professional services that may still be available in colder weather. By following this guide, you’ll learn how to maintain your cabin during winter, protect your investment, and keep your home cozy until spring.

Cabin Winter Maintenance Checklist

1. Inspect for Log Rot

Log rot doesn’t take a season off. Even in freezing conditions, moisture can find its way into compromised logs, making them cold to the touch, damp with perspiration, or even frosty on the surface. Left unchecked, rotted logs act like a highway for cold air, driving up your heating bills and spreading structural damage.

How to check:

  • Look for soft spots or spongy wood.
  • Check for frost buildup or “icy hairs” on logs.
  • Pay close attention to shaded or moisture-heavy areas.

Professional help: Winter is still an ideal time for log repair and replacement. Our team can remove and replace rotted sections, helping you save on heating costs and prevent further damage.

2. Seal Gaps and Drafts

As logs expand and contract with the seasons, gaps can appear between them or around windows and doors. These openings may not look big, but they’re major energy drains in winter.

DIY fixes:

  • Use weather stripping around windows and doors.
  • Install temporary draft stoppers at thresholds.

Professional fixes:

  • LMR can install backer rod and grip strip in winter as a first line of defense. While full caulking or chinking requires warmer conditions, this step significantly reduces drafts and helps maintain cabin comfort.

3. Clean Gutters and Rooflines

Snow and ice dams are a real threat for log homes. If gutters are clogged, melting snow has nowhere to go, and water may back up into your roof or walls.

Checklist for gutters:

  • Remove leaves and debris in late fall.
  • Check downspouts to make sure water flows freely.
  • Consider installing gutter guards to minimize buildup.

This simple step prevents costly water damage and ensures your cabin is ready for heavy snow.

4. Check Stain and Finish Protection

A solid stain is your cabin’s armor against moisture and UV rays. If your stain is peeling, faded, or cracking, it may not be doing its job.

Winter limitations:

  • Staining and sealing require steady temps above 40°F.
  • Cold weather prevents proper curing and adhesion.

Winter strategy:

  • Schedule stain removal now so you’re ready for spring.
  • Plan ahead to book staining services early—before the busy warm season begins.

5. Pest Prevention in Winter

While some insects slow down in the cold, others seek the warmth of your home. Termites, carpenter ants, and rodents are still threats during winter.

Steps to take:

  • Inspect joints, corners, and logs for small entry points.
  • Store firewood away from your cabin to avoid attracting pests.
  • Use caulking and grip strip to close gaps until permanent sealing can be completed.

Keeping pests out in winter protects both your comfort and your logs.

6. Perform Basic Maintenance Tasks

Even when it’s cold, small maintenance jobs make a big difference:

  • Light washing – On mild days (above freezing), wash exterior logs with a low-pH soap to remove dirt and mildew.
  • Interior checks – Look for moisture around windows, vents, and joinery.
  • Ventilation – Make sure your attic and crawl spaces are properly ventilated to prevent condensation buildup.

These small steps help you maintain a cabin during winter and keep it healthier year-round.

Preparing for Winter With Professional Help

Not all services can be performed in cold weather, but Log Masters Restorations can still help prepare your cabin for winter. Depending on the conditions, we can provide:

  • Log repair and replacement
  • Old stain removal with media blasting or sanding (when temps are workable)
  • Backer rod and grip strip installation
  • Some maintenance services

For tasks like staining, caulking, or chinking that require warmer conditions, winter is the perfect time to schedule an inspection and reserve your spot for spring work.

Why Winter Repairs Matter

Many homeowners delay log home repairs until spring, but waiting can cost you:

  • Higher energy bills – Drafts and rotted logs let cold air in.
  • Worsening rot – Moisture trapped in logs spreads damage during freeze-thaw cycles.
  • Spring backlog – Contractors book up quickly in warmer months, leaving you waiting even longer.

By taking care of repairs now, you’ll have a more winter-ready cabin and peace of mind knowing your home is protected through the harshest season.

Cabin Winter Maintenance Checklist (Quick Reference)

For easy reference, here’s your short checklist to prepare and maintain your log home in winter:

  • Inspect for log rot and repair as needed
  • Seal gaps and reduce drafts
  • Clean gutters and downspouts
  • Check stain and plan ahead for spring
  • Inspect for pests and close entry points
  • Perform light washing and basic upkeep

A Log Home Maintenance Checklist for Winter

Trust Log Masters Restorations for a Winter-Ready Cabin

A log home is built to withstand the elements—but only if it’s maintained properly. By following this cabin winter maintenance checklist, you’ll protect your investment, lower your energy costs, and enjoy the season without worry.

At Log Masters Restorations, we provide expert guidance and hands-on help to keep your cabin in top shape year-round. Whether it’s repairing rotted logs, sealing drafts, or planning a spring staining project, our team is here to help.

Contact us today for a winter inspection or maintenance plan and let us keep your cabin winter-ready.

The post Cabin Winter Maintenance Checklist: Keep Your Log Home Winter-Ready appeared first on Log Home Restoration, Maintenance & Additions | Log Masters.


source https://logmastersrestorations.com/blog/winter-blasting/

source https://logmastersrestorations.blogspot.com/2025/08/cabin-winter-maintenance-checklist-keep.html

Thursday, July 17, 2025

Types of Log Rot, Rot Fungi & Wood Decay on Log Cabins

Your log home’s worst enemy isn’t wind or rain—it’s something much smaller but far more destructive: rot fungi. These silent invaders weaken your logs from the inside out, slowly turning solid wood into crumbling debris.

Log rot is more than just an eyesore; if left untreated, it can compromise the structural integrity of your home and lead to costly repairs. But by understanding what causes log rot, how to spot it, and how to prevent it, you can keep your cabin standing strong for generations to come.

The Three Types of Log Rot Fungi

Not all rot is the same. Different fungi break down wood in different ways, and identifying which type is attacking your logs is the first step to stopping the damage.

1. Brown-Rot Fungi: The Crumbler

Cubical Brown rot on oak looks like it is crumbling. Picture taken from https://en.wikipedia.org/wiki/Wood-decay_fungus on 11/19/2020.

Brown-rot fungi are among the most aggressive wood destroyers, targeting softwoods like pine, spruce, and cedar—common choices for log homes.

How to Spot It:

  • Wood becomes dry, brittle, and dark brown
  • Crumbles into small cubes or chunks (often called “cubical rot”)
  • Affected areas shrink and crack

Where It Happens:

  • Logs near the ground or in damp areas
  • Under windows and around roof overhangs
  • Basements and crawl spaces with poor ventilation

How to Prevent It:

  • Keep logs sealed and dry with a high-quality stain
  • Ensure gutters and overhangs direct water away from logs
  • Fix leaks or drainage issues before rot can spread

2. Soft-Rot Fungi: The Slow Invader

Soft-rot fungi work slower than brown or white rot, but they can attack wood even in extreme conditions—from freezing tundras to humid rainforests.

How to Spot It:

  • Wood develops deep grooves or a honeycomb-like structure
  • May be mistaken for brown rot due to similar coloration
  • Wood softens over time, especially in damp environments

Where It Happens:

  • Constantly wet areas (shady sides of the home, around sprinklers)
  • Old repairs where moisture has seeped into patched logs
  • Historic cabins with untreated wood

How to Prevent It:

  • Improve airflow by trimming trees and shrubs near the home
  • Regularly inspect for soft spots and apply borate treatments
  • Seal logs properly to keep out moisture

3. White-Rot Fungi: The Bleacher

Unlike brown rot, which breaks down cellulose, white rot attacks lignin, leaving wood pale, stringy, and spongy.

How to Spot It:

  • Wood appears bleached or lighter than the surrounding logs
  • Feels spongy or fibrous, not brittle
  • May have mushroom-like fungal growths

Where It Happens:

  • Prefers hardwoods like oak and birch
  • Rotten deck posts and log corners exposed to rain
  • Areas with high humidity and frequent rain

How to Prevent It:

  • Apply borate treatments to prevent fungal growth
  • Inspect decks and log corners regularly for soft spots
  • Re-stain logs every 3-5 years to keep moisture out

Where Does Log Rot Start? Key Problem Areas

Certain areas of your log home are more vulnerable to rot than others. If you know where to look, you can stop the rot before it spreads.

Window Seals and Ground-Contact Logs

Windows are one of the most common places where log rot begins. Poorly sealed windows allow rainwater to seep into the logs, creating the perfect environment for fungi to grow. Likewise, logs that touch the ground absorb moisture from the soil, accelerating decay. Regularly check window seals for gaps or cracking and ensure any logs near the ground are properly treated and elevated whenever possible.

Sprinkler Systems and Nearby Water Sources

Water is the leading cause of log rot, and sprinkler systems that spray directly onto logs can create a long-term moisture problem. Over time, repeated exposure weakens the wood, leading to fungal growth. Make sure your sprinkler heads are adjusted to spray away from the house and check for leaks in hoses or irrigation lines near your foundation.

Minimal Overhangs and Damaged Gutters

If your home has short overhangs or a faulty gutter system, rainwater can easily reach the logs, increasing the risk of rot. Without proper drainage, logs will remain damp long after a storm. Keep gutters clean and in good repair, and if your overhangs are too short, consider installing rain diverters to help channel water away from the logs.

Dense Shrubbery and Poor Airflow

Planting bushes, vines, or other landscaping too close to your log home can trap moisture against the wood, encouraging rot. North-facing walls are particularly vulnerable because they receive less sunlight and take longer to dry. To prevent moisture buildup, keep vegetation at least two feet away from the walls and ensure air can circulate freely around the home.

Pro Tip: North-facing walls stay damp longer than other sides of the home, so inspect them more frequently for early signs of decay.

Regular Inspections and Maintenance

Rot spreads downward as water follows gravity. Catching it early is critical to preventing costly repairs. Here’s what to check:

  • Tap logs with a screwdriver—if they sound hollow, investigate further.
  • Look for soft spots or cracks—especially in corners or near doors and windows.
  • Watch for mushrooms or fungal growth—these indicate deep decay.
  • Check your chinking and caulking—gaps can let in moisture.

If you find signs of rot, act fast. Minor rot can often be treated with a borate solution, but advanced decay requires professional repair.

Why You Should Hire a Log Home Inspector

Most traditional home inspectors aren’t trained to evaluate log homes properly. Log cabins require specialized knowledge, and hiring a certified log home inspector can save you thousands in hidden damage.

What a Log Home Inspector Looks For:

  • Signs of hidden rot and decay
  • Gaps or chinking failures that allow moisture in
  • Areas where logs are absorbing too much water
  • Structural weaknesses caused by wood breakdown

How to Find One:
Look for inspectors certified by InterNACHI or log home restoration specialists like Log Masters.

Protecting Your Log Home for Generations

Log rot isn’t inevitable—with proper maintenance and regular inspections, you can prevent decay and preserve the beauty of your log home.

  • Maintain a strict stain and sealing schedule (every 3-5 years).
  • Keep logs dry with proper overhangs, gutters, and landscaping.
  • Monitor high-risk areas and catch rot before it spreads.
  • Consult log home professionals for inspections and repairs.

Need expert log rot repairs? Contact Log Masters for a free consultation and keep your log home strong for years to come.

The post Types of Log Rot, Rot Fungi & Wood Decay on Log Cabins appeared first on Log Home Restoration, Maintenance & Additions | Log Masters.


source https://logmastersrestorations.com/blog/types-of-log-rot/

source https://logmastersrestorations.blogspot.com/2025/07/types-of-log-rot-rot-fungi-wood-decay.html

Post-Season Checklist for Ski Lodges: Maintenance and Repair

Ski season puts your lodge through months of relentless stress. Heavy snow loads, freeze-thaw cycles, constant foot traffic, salt damage, an...