Monday, June 15, 2026

DIY vs. Professional Log Home Restoration: The True Cost of Doing It Wrong

Most homeowners who start a DIY log home restoration project are coming from a good place. You want to save money. You want to take pride in the work. And honestly, something is appealing about rolling up your sleeves and bringing your cabin back to life.

But here’s the reality we’ve seen time and time again: log homes don’t behave like other homes.

They’re not vinyl siding. They’re not brick. They’re not forgiving.

A log home is a living system made of natural wood, constantly reacting to moisture, sunlight, temperature, and time. And when restoration isn’t done correctly, the problems sink deeper into the structure.

Because of this, it’s incredibly important that if deciding whether or not to do DIY log home restoration, you first do your research, consider the intricacies of log homes, and make note of what it really costs if things go wrong.

Why the DIY vs. Pro Decision Matters More for Log Homes Than Other Structures

With most homes, mistakes are visible and fairly easy to fix. Paint starts peeling? Repaint it. Caulk cracks? Replace it.

Log homes don’t give you that kind of grace.

Wood expands and contracts constantly. It absorbs moisture. It dries out. It’s vulnerable to UV damage, insects, and rot. Every layer you apply—cleaner, stain, chinking—has to work together as a system.

If something is done incorrectly, the issue doesn’t always show up right away. It can sit beneath the surface, quietly getting worse until you’re dealing with structural damage instead of a cosmetic fix.

That’s the biggest difference.

A mistake in a traditional home is frustrating.

A mistake on a log home can be expensive—and sometimes serious.

What Log Home Restoration Actually Involves

A lot of homeowners think restoration means “clean it up and put on a new stain.”

If only it were that simple.

A proper restoration is a step-by-step process where each stage builds on the last. If one step is skipped or done incorrectly, everything after it is compromised.

Surface Preparation: Cleaning, Stripping, and Media Blasting
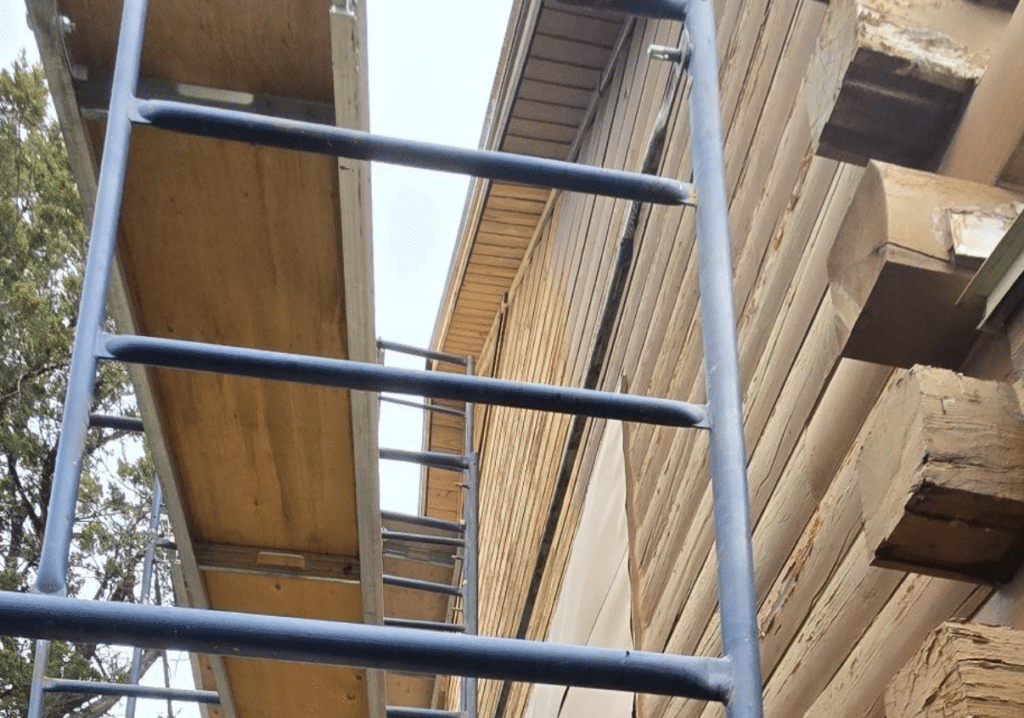
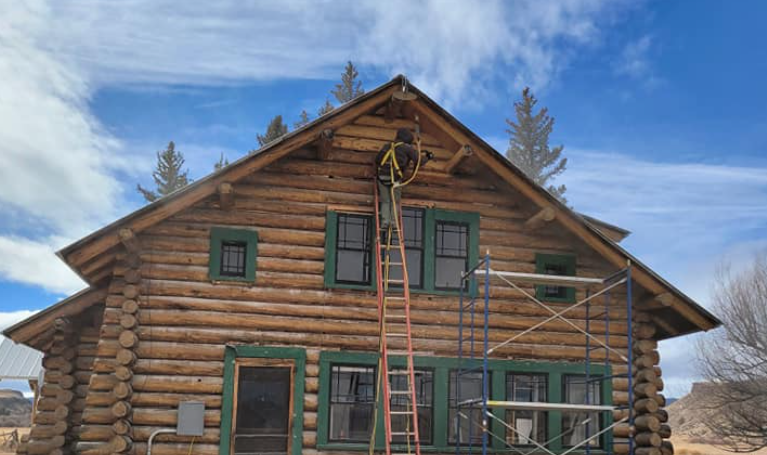
Setting Scaffolding for Restoration

This is where everything starts—and where most DIY projects run into trouble.

Cleaning a log home isn’t just spraying it down. You’re removing dirt, mildew, algae, and oxidation without damaging the wood. Too much pressure raises the grain or scars the logs. Too few leave contaminants behind that prevent new finishes from bonding.

If there’s an old stain or paint, it has to come off completely.

That’s where chemical stripping or media blasting comes in. Both require experience to do correctly. Media blasting, especially, is incredibly effective, but only when pressure, material, and technique are dialed in just right.

Get it wrong, and you could be damaging the logs as you clean them.

Rot Repair and Log Replacement

Once the surface is stripped back, the truth comes out. And sometimes, it’s not what homeowners expect.

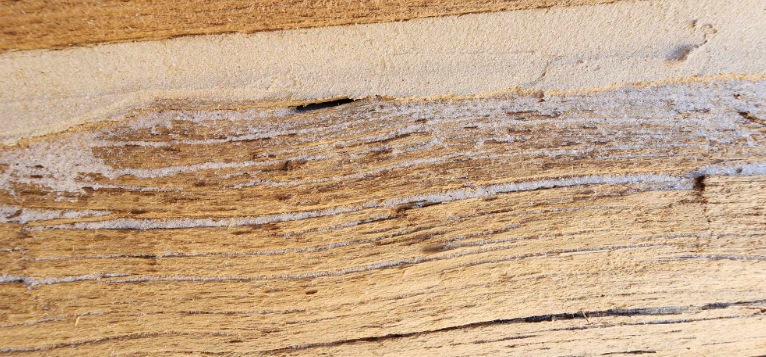
Rot isn’t always obvious at first glance. What looks like a small soft spot can actually be a sign of deeper decay. In a DIY log home restoration, it’s common to fix what’s visible and miss what’s underneath.

That’s why, if you’re going to be doing it yourself, you need to not only know what to look for but also be incredibly thorough in your inspection.
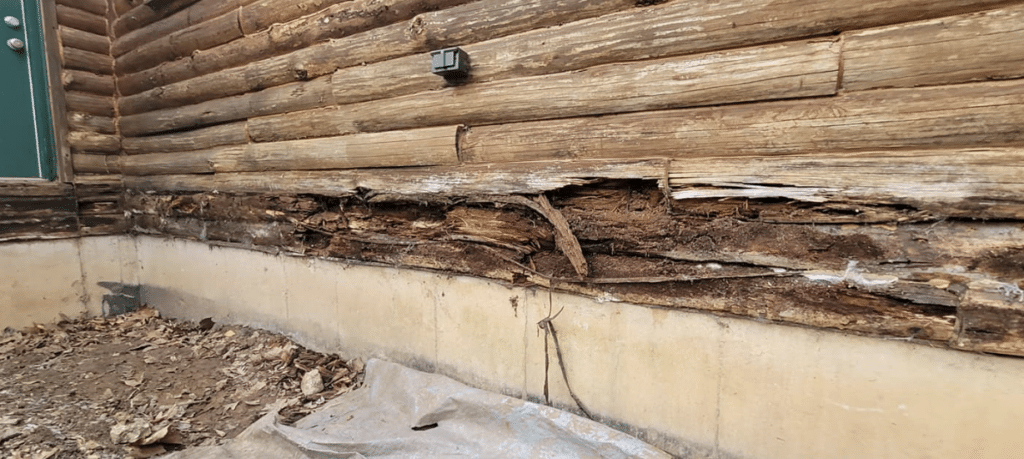
Inspection Finding Log Rot on Cabin

Early-stage rot can sometimes be stabilized. But more advanced damage requires proper repair or full log replacement. That involves structural knowledge, precision fitting, and blending the repair into the rest of the home.

This isn’t just patchwork. It’s structural work.

Chinking, Caulking, and Sealing

Chinking, caulking, and sealing protect your home from moisture, air leaks, and pests.

Over time, they break down. They shrink, separate, and lose adhesion. When that happens, water gets in. And once water gets in, it stays.

Proper application requires clean surfaces, correct backer materials, and the right technique so the seal can flex with the logs as they move.
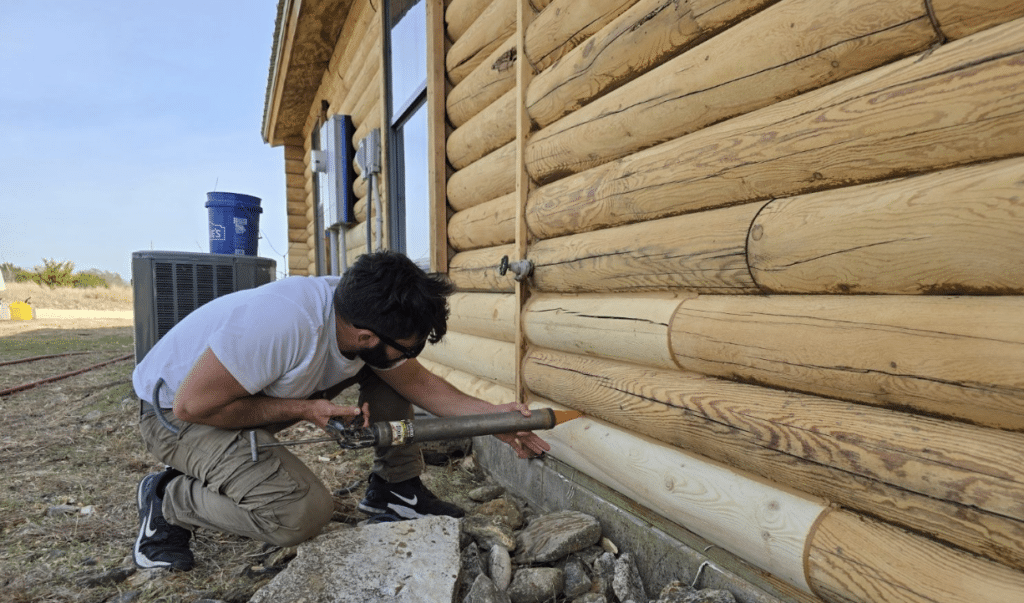
Log Masters Restorations Technician Applying Caulk to Home During Restoration

If that bond fails, you’re back to square one—only now moisture has already started doing damage behind the scenes.

Staining and Finishing

This is the part most people look forward to, but it’s also where mistakes become visible.

Stain isn’t just about color. It’s your home’s primary defense against UV rays and moisture. It needs to protect the wood while still allowing it to breathe.

Choosing the right product is only part of it.
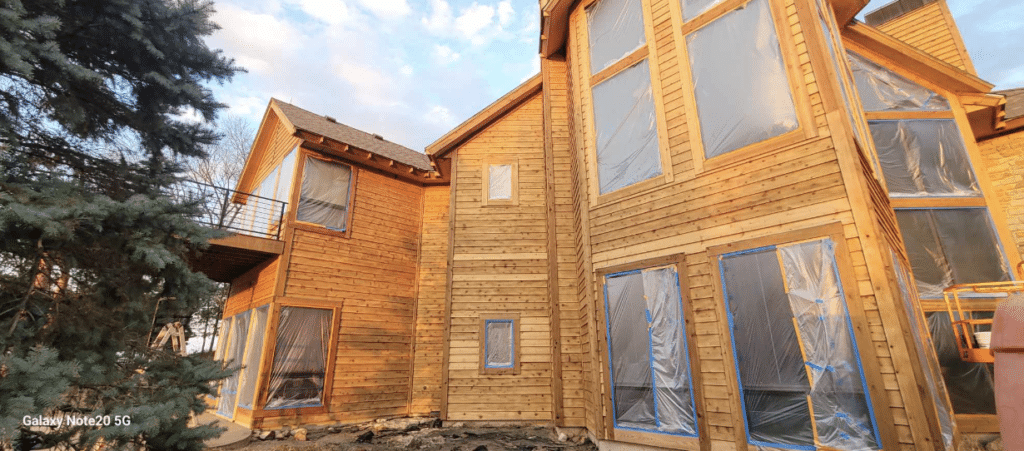
Restoration in Progress Before Staining

Application matters just as much: coverage, timing, weather conditions, and compatibility with what’s already on the logs.

Done correctly, your finish lasts. Done incorrectly, it traps moisture and starts failing far sooner than it should.

What DIY Log Home Restoration Realistically Costs

Tools and Equipment You’ll Need to Buy or Rent

Washing a log home requires a commercial-grade pressure washer capable of the right PSI range for wood, which is not the same unit you use to clean your driveway or other concrete or stone surfaces. You’ll also need extension wands, appropriate nozzles, and the right cleaning supplies for whatever contaminants are present.

If the project involves media blasting, that equipment is expensive to rent and requires training to operate safely on wood.
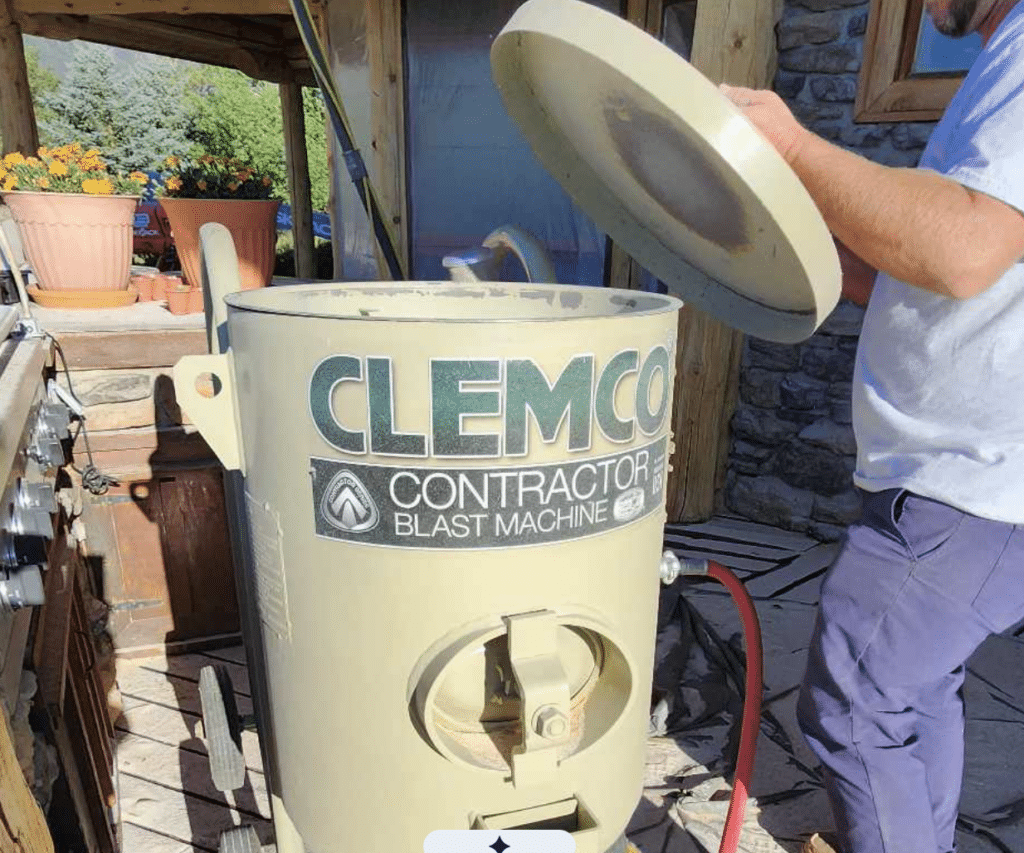
Log Masters Restoration Team Using Media Blaster for Restoration Project

Additionally, scaffolding is often required for multi-story homes.

Equipment rental or purchases, scaffolding, and other prep costs can add up to thousands before a single drop of product is applied.

Log Home Maintenance Products: What to Budget For

Quality matters here—a lot.

Professional-grade stains and systems aren’t cheap, but they’re built to last. Lower-cost alternatives may look similar, but they don’t perform the same. When they fail early, you’re doing the job again, sooner than you planned.

Quality stains designed specifically for log construction run $75 to $110 per gallon. A full restoration on a 3,000-square-foot home requiring two coats can consume 40 or more gallons, putting material costs between $3,000 and $4,500 for stain alone — and that’s before factoring in clear coat, which is required for water-based stains but not oil-based.

For maintenance applications, those same dimensions may only need around 15 gallons of stain or clear coat: clear coat runs approximately $270 per 3 gallons, while stain runs approximately $330 per 3 gallons. Keep in mind that cabins may require more product depending on the logs’ current condition, since every log home responds differently based on its environmental exposure.

For a full log home restoration, media blasting, staining, chinking, log replacements, and other material costs can easily reach several thousand dollars, depending on size and condition.

Time Investment: Hours Per Stage of the Project

This is the part most people underestimate.

The restoration work itself takes time, but so does everything that happens before the project begins. Equipment, materials, compressors, scaffolding, stains, replacement logs, and safety gear all have to be transported to the property. Depending on the size and location of the home, simply setting up a job site can take a full day.

Then comes the restoration process itself: cleaning, drying, repairs, sealing, staining, and curing between coats. Some projects even require specialty equipment, such as lifts, when terrain makes scaffolding unsafe or impractical.

What starts as a “few weekends” often turns into weeks of ongoing work. And that’s before factoring in learning curves, weather delays, or costly mistakes.

What Professional Log Home Restoration Costs and What You Get for It

Yes, hiring a professional costs more upfront.

But what you’re really paying for is experience, efficiency, and long-term results.

A professional crew understands how to evaluate your home before the work begins. They know how to identify issues that aren’t obvious and how to address them properly.

They also use systems designed to work together—applied in the right order and under the right conditions.

Paired with consistent maintenance, that’s what gives you a finish that lasts years, not just months.

And just as important, you’re getting peace of mind: when the work is done right the first time, you’re not worrying about what’s happening beneath the surface.

The True Cost of DIY Mistakes: Where Things Go Wrong

This is where the conversation shifts. Because most homeowners don’t regret trying, they regret what it costs to fix it afterward.

Improper Surface Prep Leading to Premature Finish Failure

This is the number one issue we see.
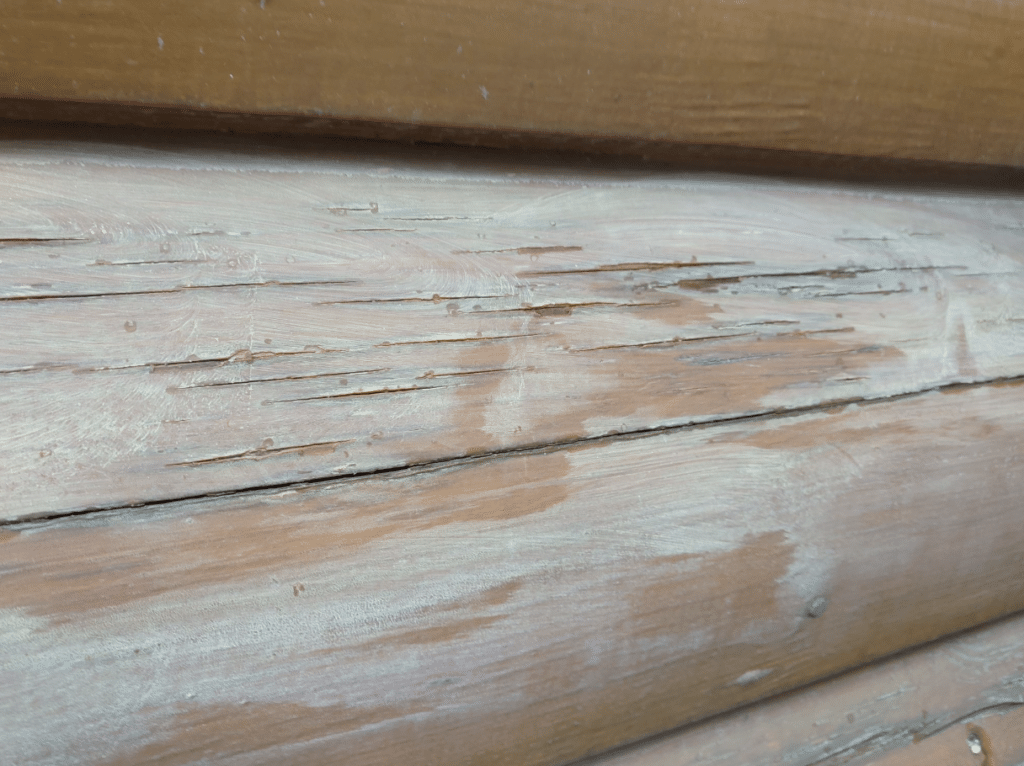
Improper Cleaning Before Stain Project

When logs aren’t cleaned thoroughly, or the old finish isn’t fully removed before the new product goes on, the new finish has no clean wood surface to bond to. It might look great at first, but within a year or two, it starts peeling.

And when that happens, you can’t just touch it up. Please remove everything and start over.

Missing Rot or Structural Damage During Assessment

DIY assessments often miss early signs of deeper issues. An experienced eye can read a log home’s condition in ways that aren’t obvious to homeowners.

We check for:

  • Structural integrity & settling
  • Surface discoloration
  • Soft spots
  • High moisture readings
  • Stain failures
  • Future maintenance issues
  • Shading and Sunlight UV damage –ensure air flow for natural drying
  • Logs vs Log siding
  • Water Drainage around gutters, windows, doors, decks, etc
  • Improper application of stain, caulking, or chinking
  • Fungal/organic growth
  • Design flaws
  • Pest damage/activity
  • Past maintenance history
  • Log type and species

DIY assessments routinely miss early-stage rot because it doesn’t always look dramatic until it’s well progressed.

Plus, when rot is sealed under a new finish, it keeps spreading. What could have been a manageable repair turns into something much larger and much more expensive.

Wrong Products, Wrong Application, Wrong Sequence

Log home systems are designed to work together. The cleaner, brightener, stain, and topcoat from a given manufacturer are formulated to work together in a specific sequence.

Mixing or substituting the wrong products, or skipping steps, can create layers that trap moisture rather than protect against it.

Additionally, manufacturer warranties are voided when products are used outside their specified conditions, leaving the homeowner with no recourse if the finish fails prematurely.

How Re-doing Failed DIY Work Inflates the Final Bill

When professionals step in after a failed DIY log home restoration, the job is bigger than it would have been originally.

Now it’s not just restoration—it’s restoration plus correction. That means more time, more labor, and more cost.

Tasks You Can Realistically DIY vs. Tasks That Need a Pro

There are absolutely things you can handle yourself.

Light cleaning, clearing debris, and small touch-ups are all reasonable. These all require little prior knowledge or skills and pose minimal risk.

But full restoration work—anything involving stripping, structural repairs, or full-system application—is where professional experience makes all the difference. Getting any of these things wrong will lead to much higher costs later on if things go south.

The key is knowing where that line is.

How to Vet and Hire a Professional Log Home Restoration Crew

Not all contractors are the same.

Log home restoration is a specialized field. It requires knowledge that goes beyond general construction or painting.

When evaluating a crew, look for:

  • Experience specifically with log homes
  • Knowledge of product systems and application methods
  • A clear process for assessing damage before starting
  • References from real log home projects
  • Certifications from trusted product manufacturers

You’re not just hiring someone to work on your home. You’re trusting them to protect it.

Making the Call: DIY or Professional?

Ultimately, this decision comes down to scope and risk.

If your home needs light maintenance, a DIY approach to log home restoration can work for smaller tasks.

But if you’re dealing with aging finishes, potential rot, or full exterior restoration, that’s where professional expertise becomes the smarter investment.

Log Masters Restorations has spent over twenty years helping homeowners protect and restore their log homes the right way. We’ve seen what happens when things go right and what happens when they don’t.

If you’re unsure what your home needs, that’s exactly where we come in.

Reach out for a free estimate, and we’ll help you understand what’s really going on with your logs and what it takes to protect your investment for the long run.

The post DIY vs. Professional Log Home Restoration: The True Cost of Doing It Wrong appeared first on Log Home Restoration, Maintenance & Additions | Log Masters.


source https://logmastersrestorations.com/blog/diy-vs-professional-log-home-restoration/

source https://logmastersrestorations.blogspot.com/2026/06/diy-vs-professional-log-home.html

Monday, June 1, 2026

The Log Masters Staining Process: What Actually Happens on Job Day

There’s something special about seeing a log home come back to life.

The color is rich again. The grain stands out. The entire structure feels protected, solid, and cared for. But that transformation doesn’t happen from a quick coat of stain. It comes from a proven process, built on years of experience and attention to detail.

At Log Masters Restorations, we’ve spent more than two decades refining our approach to log home staining across Missouri, Arkansas, Colorado, Illinois, Nebraska, Texas, and Oklahoma. What we’ve learned is simple: the outcome is only as good as the preparation behind it.

Here’s exactly what happens when our team shows up to stain your home—and why every step matters.

Before We Arrive: What to Expect

Before we show up, you should receive a welcome email from your designated Project Manager. It will include a Pre-Service Preparation Checklist and a few other important instructions for your upcoming project. It’s also a great time for you to reply with any questions you have, so we can address them before we arrive.

What to Expect When Log Masters Shows Up

Log Masters Project Manager Talking to Log Home Resident

A professional log home staining project is not a quick in-and-out job. Depending on your home’s size and condition, the process can take several days and involve multiple phases before the stain is even applied.

It starts with a conversation.

We walk your property with you, look closely at the condition of your logs, and talk through what we’re seeing. You’ll know what needs to be done, what can wait, and what’s most important to protect your home in the long term.

We’ve seen situations where a home looks “fine” from a distance, but closer inspection reveals failing stain, mildew buildup, or early signs of moisture intrusion. In one recent project, a home had a failing finish that was allowing water into the wood. After a full prep process and proper stain application, that home is still holding strong years later.

That’s the difference between simply applying the stain and doing the job right.

Why Does Staining Matter? The Consequences of Stain Neglect

Your log home is constantly exposed to the elements.

Sunlight breaks down wood fibers. Rain introduces moisture. Temperature swings cause expansion and contraction. Over time, all of this adds up.

Without proper log home staining, that protection barrier disappears. Once that happens, moisture gets into the wood, leading to mold, rot, and eventually structural damage.

And here’s the reality most homeowners don’t hear early enough: maintenance is always more affordable than repair.

A routine staining project protects your investment. Ignoring it can lead to costly repairs that go far beyond the surface.

Staining isn’t just cosmetic; it’s one of the most important ways to protect the structure of your home.

How Often Should You Restain a Log Home?

There’s no one-size-fits-all answer, but there are reliable guidelines.

Most homes benefit from log home staining every 3 to 7 years, depending on a few different factors:

  • Sun exposure, especially on south and west-facing walls
  • Elevation and UV intensity
  • Local weather patterns
  • Type of stain previously applied
  • Quality of the original preparation and application

Signs Your Log Home Needs a New Stain

Your home will usually give you clear signs when it needs attention.

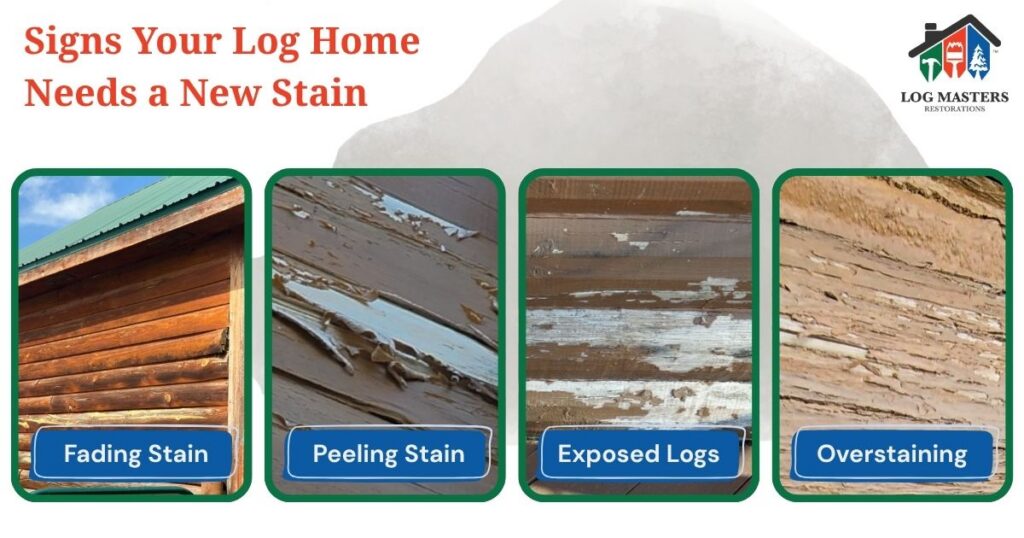
Fading color is often the first indicator. From there, you may notice peeling, cracking, or chalking on the surface. Dark patches after rain are another red flag, signaling that moisture is being absorbed instead of repelled.

If your logs have turned gray or silvery, that’s UV damage already at work.

A simple test can tell you a lot. Sprinkle water on your logs. If it beads up, your stain is still doing its job. If it absorbs quickly, it’s time to start thinking about restaining.

Catching these signs early allows for maintenance-level work. Waiting too long often leads to more intensive restoration.

First Things First: Site Setup and Surface Assessment

Protecting Landscaping, Windows, and Surrounding Structures

Before we ever touch your logs, we take the time to protect everything around them.

We carefully cover landscaping, decks, windows, doors, fixtures, and nearby structures. Overspray from staining or debris from prep work can easily damage surfaces if they’re not properly shielded.

This step may not be the most exciting part of the process, but it’s one of the clearest indicators of a professional crew. When the job is done, your home should look better… not like it just went through a construction zone.

Reading the Wood: What We Check Before Touching the Surface

Every log home tells a story, and before we begin any log home staining project, we take the time to read it.

We look for moisture levels, soft spots, UV damage, failing finishes, and signs of insect activity. We also evaluate how well the current stain is holding and whether it’s bonding properly to the wood.

In some cases, we may discover other types of damage, such as squirrel damage. We will discuss any needed repairs with you before we stain.

This assessment shapes the entire plan. Two homes may look similar from the road, but require completely different prep strategies. That’s why we never jump straight into staining—we make decisions based on what your wood actually needs.

Time to Prep: What We Do Before Staining

Removing Old Stain with Media Blasting or Stripping

If the existing stain is failing, it has to come off. Applying a new stain over a compromised surface is one of the fastest ways to waste time and money.

Media blasting is often our go-to method because it removes old stains while preserving the wood’s integrity. In some cases, chemical stripping may be the better option, especially for certain coatings or delicate areas.

The goal is simple: get back to a clean, sound surface so the new stain can bond properly and provide protection.

Smoothing Rough Grain with Sanding/Grinding

Over time, exposure to sun and weather can raise the grain of the wood, leaving it rough and uneven.

Sometimes, stubborn stains stick even after media blasting, which will require sanding or grinding. This creates a more uniform surface. This not only improves the final appearance but also helps the stain absorb more evenly.

It’s a step that many skip, but when a home needs it, this makes a noticeable difference in both the look and longevity of your log home staining project.

Removing Dust and Debris with a Cleanup & Blow Down

After blasting or sanding, dust settles into every crack, crevice, and joint.

We use high-powered air blowers to completely remove that debris. If dust is left behind, it can interfere with stain adhesion and lead to uneven coverage.

Think of this step as resetting the surface—clean, clear, and ready for the next phase.

Checking for Mildew and Cleaning the Surface with a Log Wash

Mildew, algae, and organic growth are common on log homes, especially in shaded or moisture-prone areas.

If we see any signs of growth, we apply a specialized log wash to thoroughly clean the surface. A log wash is a concentrated, environmentally friendly cleaner that, if needed, removes dirt, pollen, and mold without damaging anything and prepares wood for new coats of stain.

We don’t want to keep any contaminants around that would otherwise get sealed under the new stain.

Preventing Mold, Rot, and Bugs with a Borate Application

Once the wood is clean and exposed, we apply a borate treatment.

Borate penetrates the wood and provides long-term protection against mold, decay fungi, and wood-boring insects like termites and carpenter ants.

This is one of the most valuable protective steps in the entire process. It works beneath the surface, helping safeguard your home long after the staining is complete.

Controlling PH and Wood Tone with Brightener

After cleaning, the wood’s pH can become imbalanced, and the color may appear dull or uneven.

If the home needs it, a brightener helps restore the wood’s natural tone while bringing the pH closer to the level needed for proper stain adhesion.

It’s also what brings that fresh, natural wood look back before stain is applied—setting the stage for a more vibrant final result.

Restoring PH with a Neutralizing Wash

If alkaline cleaners were used during prep, a neutralizing wash is critical.

Without it, the surface may remain out of balance, leading to adhesion issues or premature stain failure.

This step ensures the wood is in ideal condition to accept stain and perform as intended.

Improving Wood Grain Visibility with Prelude/Wood Primer

For older or heavily weathered homes, we may apply a wood primer or a Prelude product.

This helps even out absorption across the surface, enhances grain definition, and improves the overall consistency of the stain application.

It’s especially useful when dealing with mixed conditions across a home, where some areas may absorb stain differently than others.

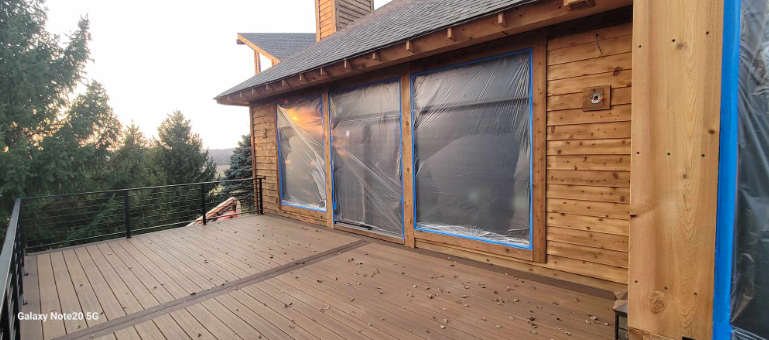
Doing Our Final Surface Check and Masking

Before the stain ever touches the wood, we do one last full inspection.

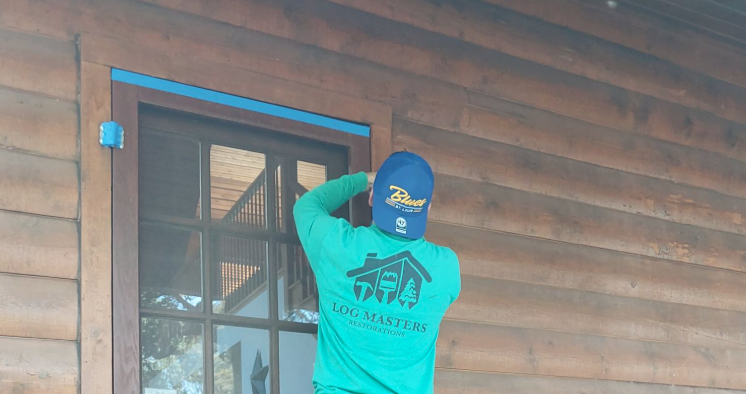
We check for missed areas, confirm the surface is clean and balanced, and make any final adjustments. Then we carefully mask off windows, trim, stonework, and foundations to ensure clean lines and a polished finish.

At this point, everything is ready—and only then do we move into the staining phase.

Applying the Log Home Stain and Sealer

How We Select the Right Exterior Stain for Your Log Home

Not all stains are created equal, and choosing the right one is critical.

We consider your home’s exposure to sun, moisture, and weather, as well as the condition of the wood itself. Some homes benefit from deep-penetrating oil-based stains, while others perform better with water-based systems that offer advanced UV protection.

Our goal is to select a system that will protect your home in the long term—not just look good on day one.

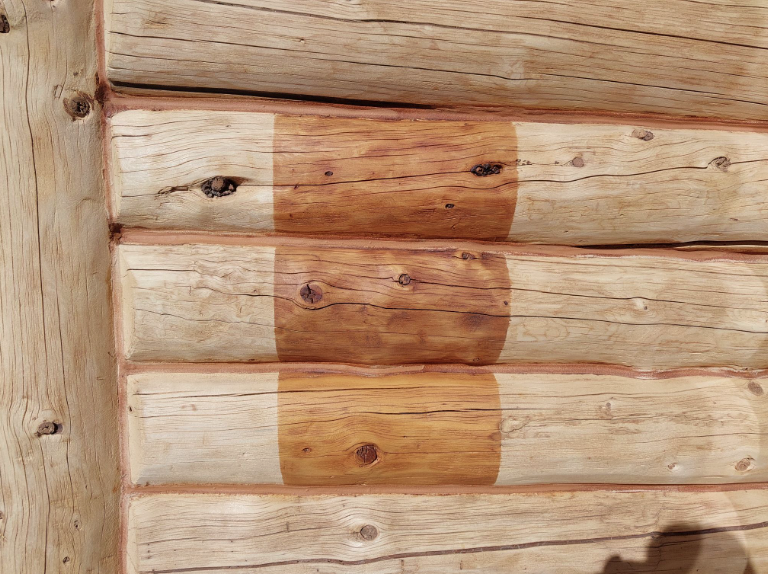
Stain Sampling: Choosing Your Stain Color

Color selection is more complex than picking from a brochure.

We apply sample stains directly to your logs so you can see how the color looks in real lighting and against your home’s natural wood tone.

This step eliminates guesswork and ensures you feel confident before committing to the full application.

Application Method: Brush, Spray, or Back-Rolled — and Why It Matters

We don’t rely on just one method—we use the combination that delivers the best results.

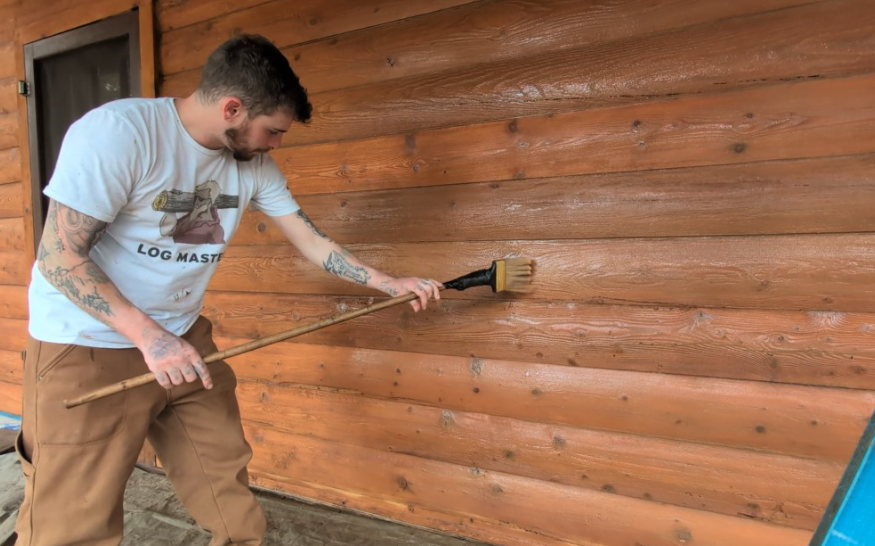
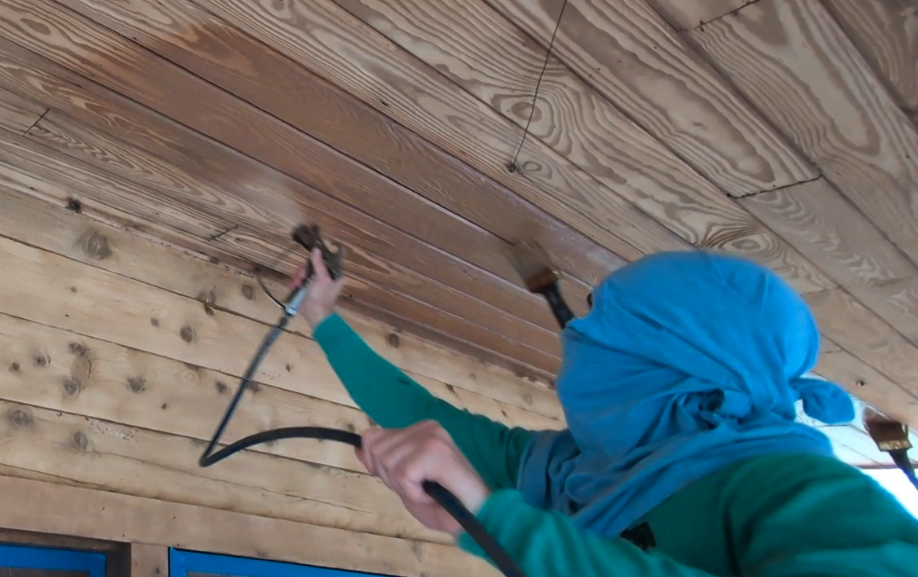
Spraying allows for efficient, even coverage, while brushing or back-rolling works the stain into the wood for deeper penetration.

This approach ensures your log home staining project doesn’t just sit on the surface but truly protects the wood beneath.

Coverage, Coat Count, and Working in Sections

Proper coverage is everything.

We follow manufacturer guidelines closely for how much stain to apply and how long to wait between coats. Most homes require multiple coats to achieve full protection.

We also work within controlled sections to maintain consistency throughout the structure. This avoids lap marks, uneven tones, and other common issues that show up when staining isn’t done methodically.

Our teamwork approach is also highly beneficial. One technician sprays the stain on, while another immediately brushes it in (before it dries). This allows the team to work along log-linear paths to avoid lap marks.

End Grain, Checks, and Crevices: The Details Most Applicators Miss

The most vulnerable parts of your log home are also the easiest to overlook.

End grain, cracks (checks), and tight crevices absorb moisture faster than flat surfaces. If these areas aren’t properly sealed, they become entry points for water and decay.

We take extra time to hand-apply stain in these areas, ensuring they are fully saturated and protected.

Optional: Fire Retardant and Resistant Coatings for Log Homes

In certain regions, especially fire-prone areas, additional protection may be recommended.

Fire retardant or fire-resistant coatings can be applied as part of the staining process, adding another layer of defense without compromising the look of your home.

If this is something you’re considering, we’ll walk you through the options and help determine what makes sense for your location. We also encourage you to check the factory warranties and compatibilities between these coatings and the stain to ensure both will work together.

What Happens After Staining? A Brief Overview

For some homes, staining a log home is part of a simple maintenance plan. For others, it’s one of the last steps of a larger restoration plan.

Depending on your home, we may do two things after we finish staining:

  • Chinking and Chink Painting: Seals gaps between logs to keep out air and moisture while improving energy efficiency.
  • Detail Work: Light sanding or touch-ups to create a clean, consistent finish

The Final Walkthrough and Ongoing Care

Once the final coat is complete, we don’t just pack up and leave.

We perform a detailed inspection, checking for consistency, coverage, and any areas that need additional attention. Then we walk through the project with you to make sure everything meets your expectations.

After your log home staining project is complete, ongoing maintenance becomes much simpler.

We will provide you with a magnet to note the stain we used, along with the next expected maintenance, so you can place it in a spot to remind you (many choose their refrigerator or the main electrical box of the cabin). We will also reach out to you with reminders when the time comes for routine maintenance. We are the company you hire for the life of your cabin; we’ll be there for you year after year.

Our goal isn’t just to make your home look great today. It’s to keep it protected for years to come.

Ready to Schedule Your Log Home Staining Job?

If your home is starting to look faded, weathered, or simply hasn’t been stained in a few years, it’s time to take a closer look.

A professional log home staining project does more than improve appearance. It protects your home from the elements, extends its lifespan, and helps you avoid costly repairs down the line.

At Log Masters Restorations, we take pride in doing the job the right way—from preparation to final walkthrough. You’ll always know what’s happening, why it matters, and what to expect next.

Reach out today for a free estimate, and let’s talk about what your log home needs to stay strong, beautiful, and protected for years to come.

The post The Log Masters Staining Process: What Actually Happens on Job Day appeared first on Log Home Restoration, Maintenance & Additions | Log Masters.


source https://logmastersrestorations.com/staining/log-masters-log-home-staining-process/

source https://logmastersrestorations.blogspot.com/2026/06/the-log-masters-staining-process-what.html

Celebrating 10 Years of Log Masters Restorations

Ten years. That is how long we have been climbing ladders, mixing stain, and getting sawdust in our boots for log home owners like you. Log ...